Sage Intacct connection requirements
This guide explains how to configure your Sage Intacct account and generate the authentication credentials required to integrate with Zudello. Once generated, you'll need to provide the credentials to your Zudello Implementation consultant or implementation@zudello.com.
Before you start
You'll need:
- Administrator access to your Sage Intacct account
- Permissions to access Company records
- Notepad or document to securely store the generated credentials
Once you've finished
By the end of this guide, you'll have:
- Subscribed to web services in Sage Intacct
- Added Zudello as a trusted sender
- Created a role with appropriate permissions
- Generated web user credentials for the integration
Step 1: Subscribe to Web Services in Sage Intacct
- In the Sage Intacct top menu bar, hover over Setup
- Under Company > Admin, click Subscriptions
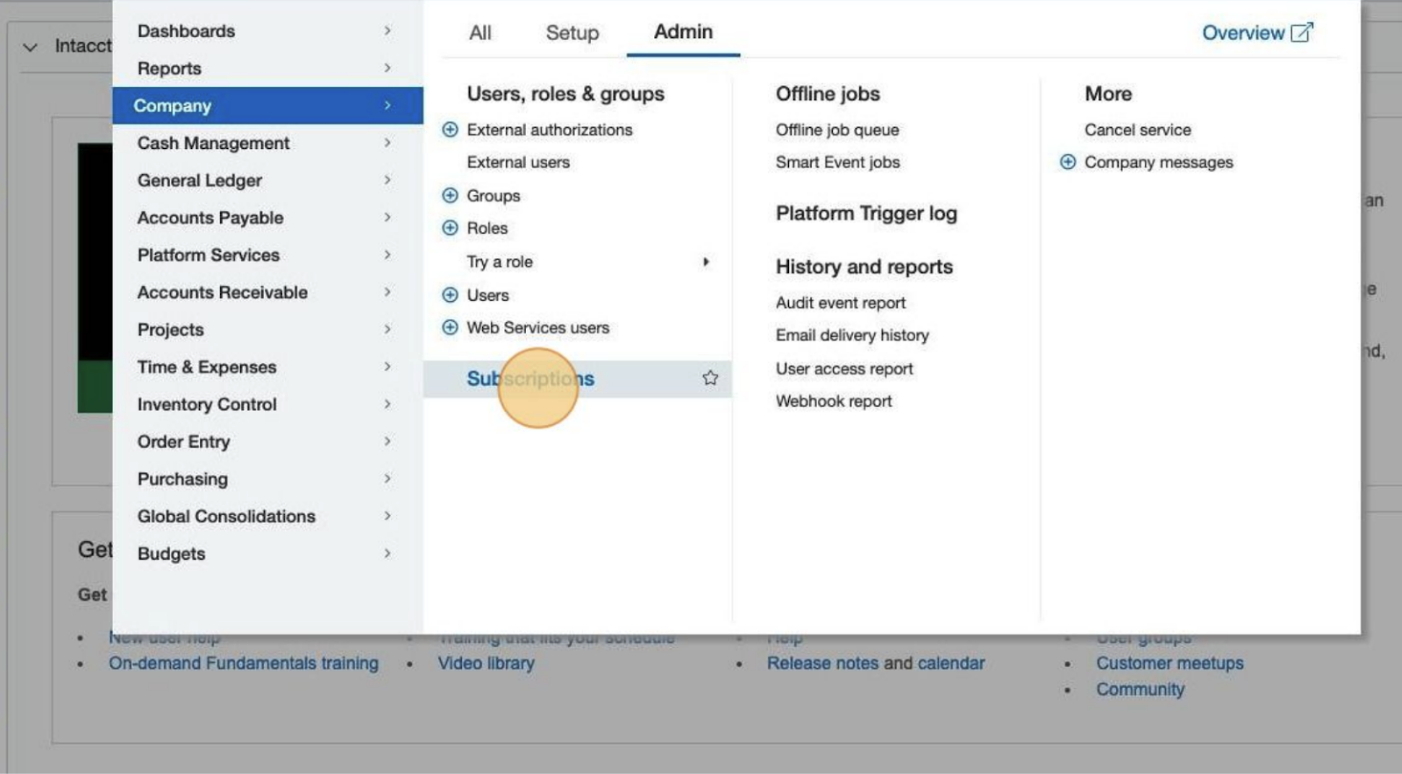
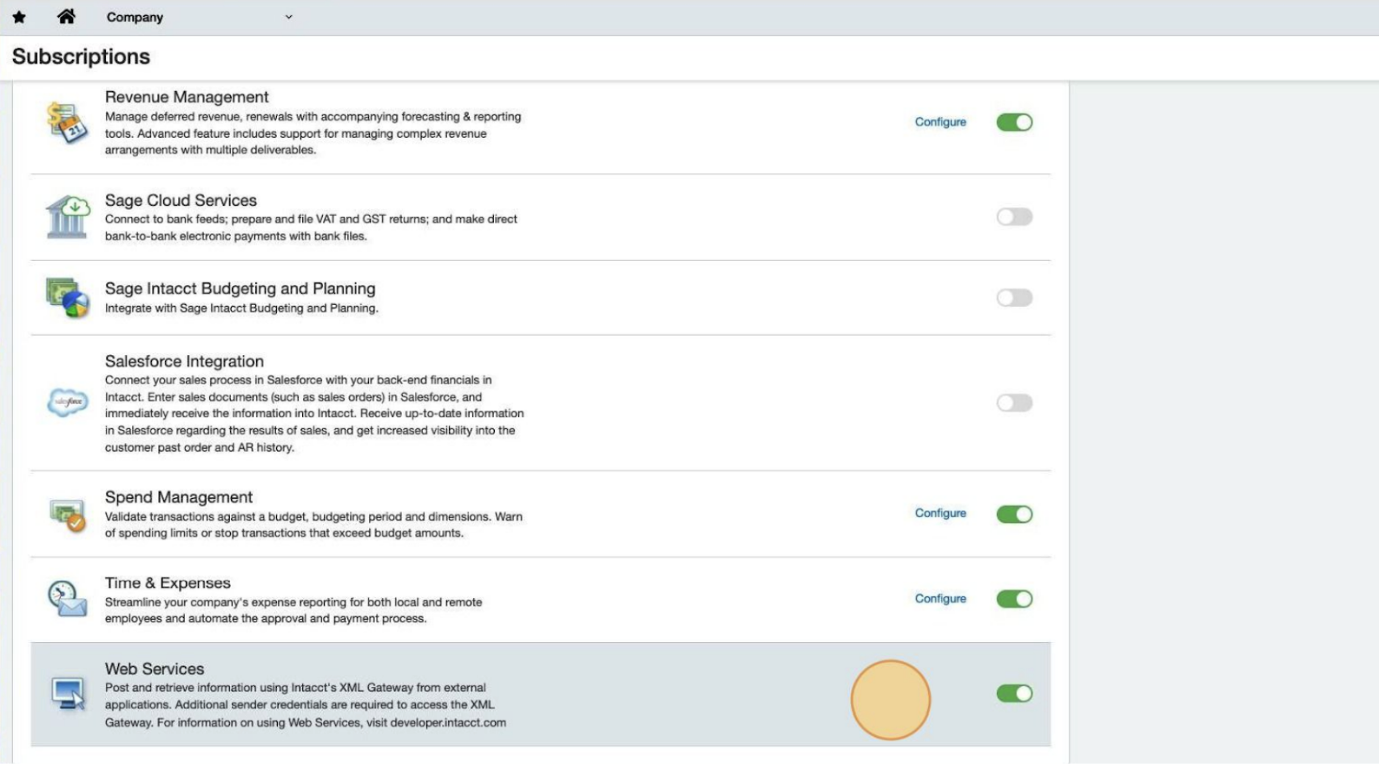
- Scroll down to Web Services and ensure it is enabled.
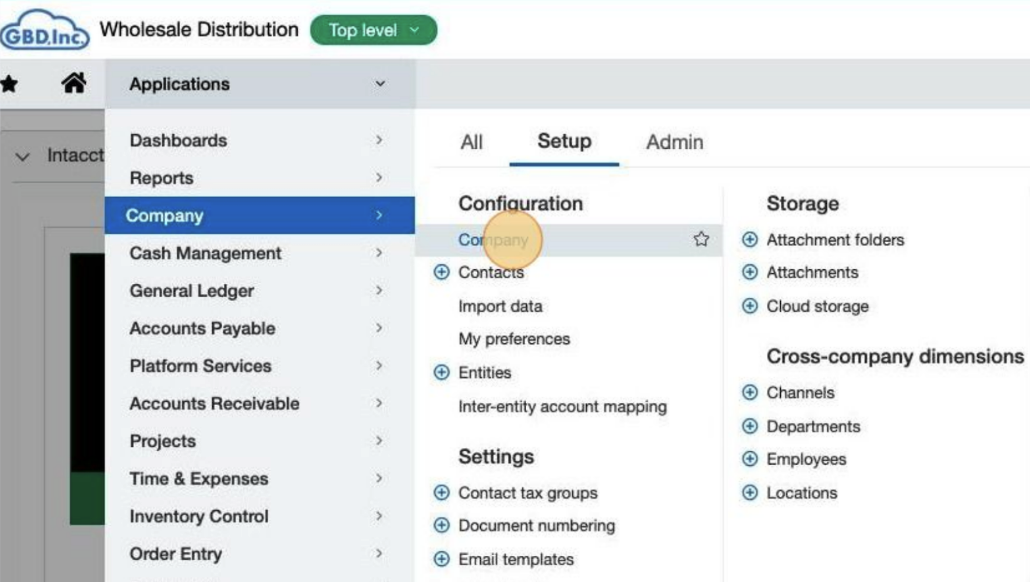
Step 2: Add Zudello as a trusted sender
- In the top menu bar, hover over Setup
- Under Company > Setup, click Company
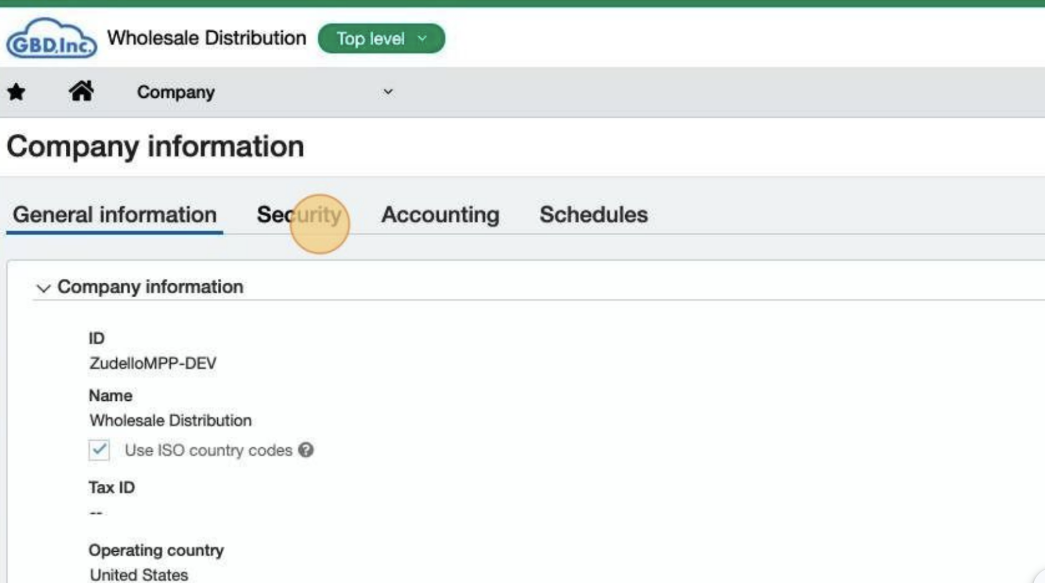
- Click the Security Tab
- Click Edit
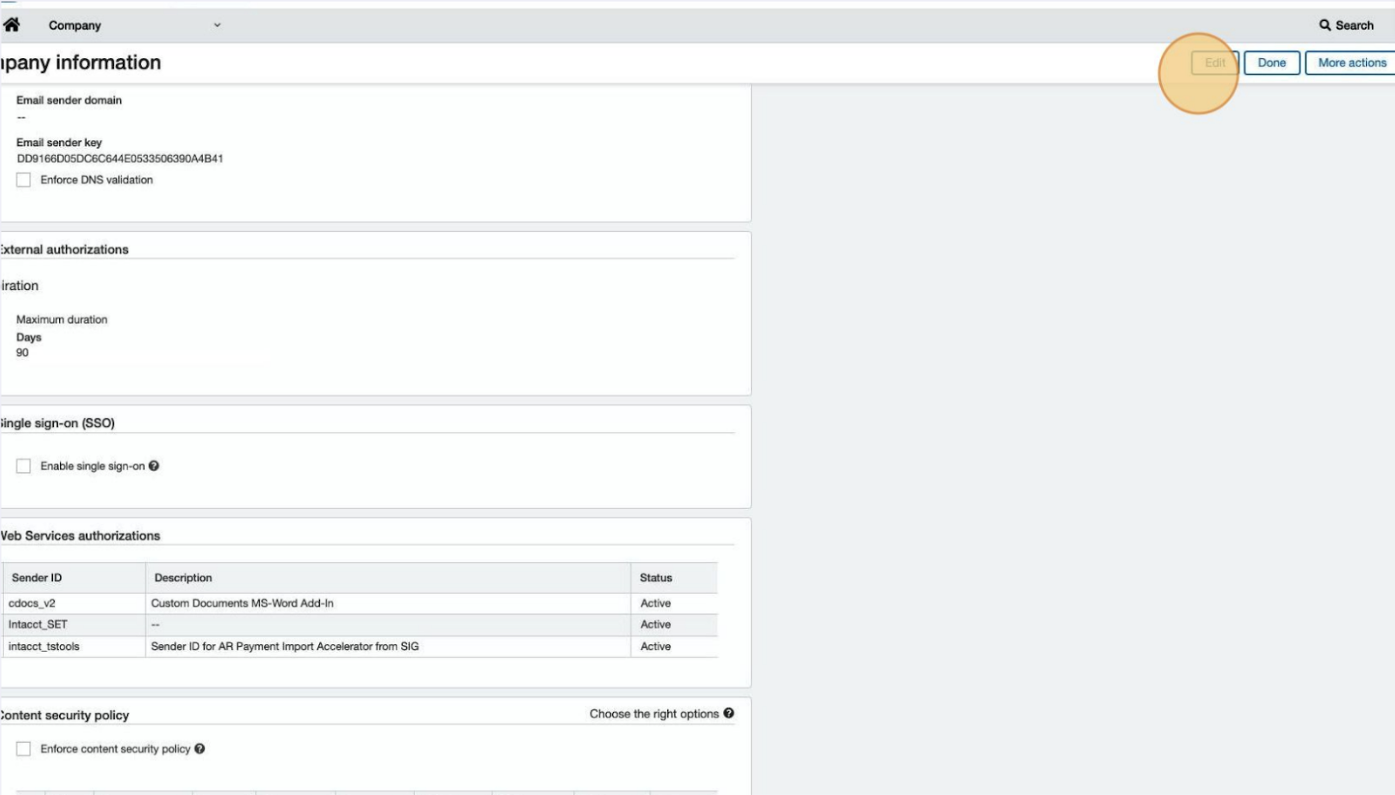
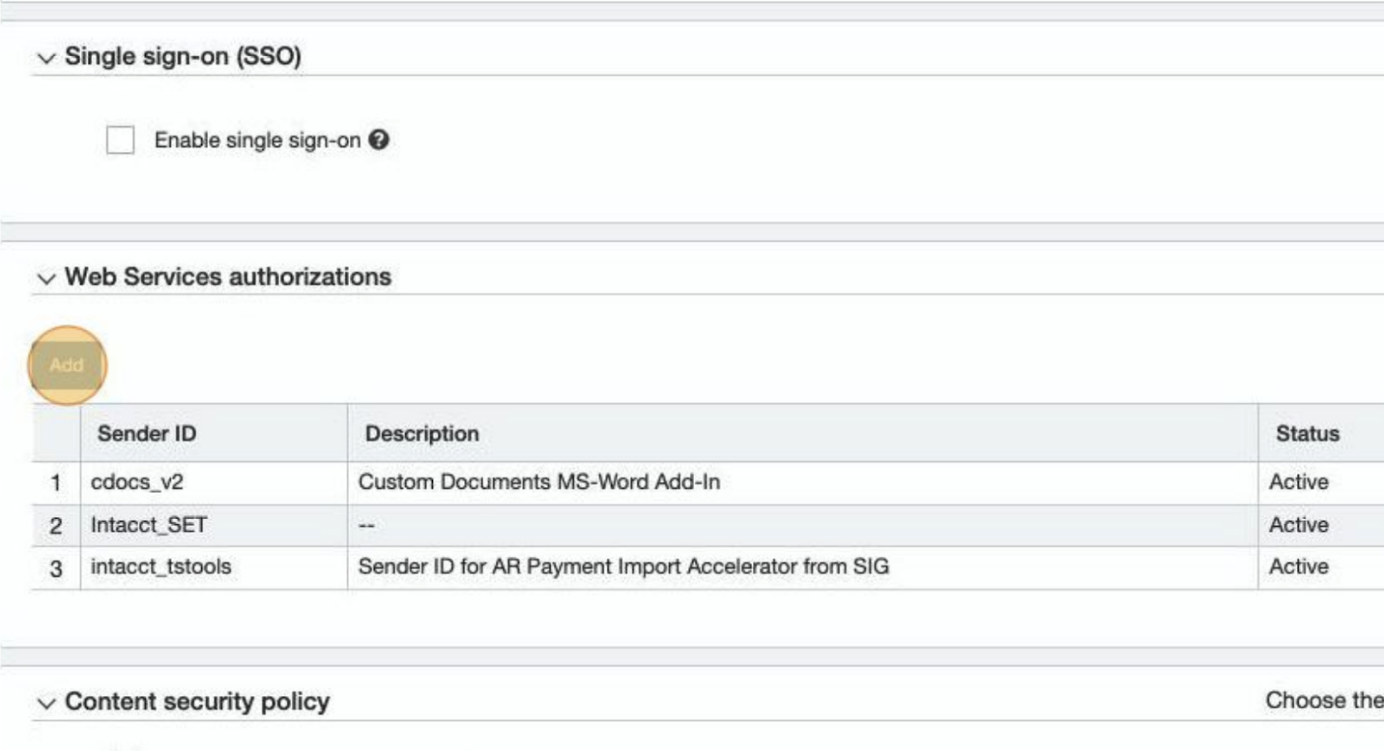
- Scroll down to Web Services authorizations and click Add
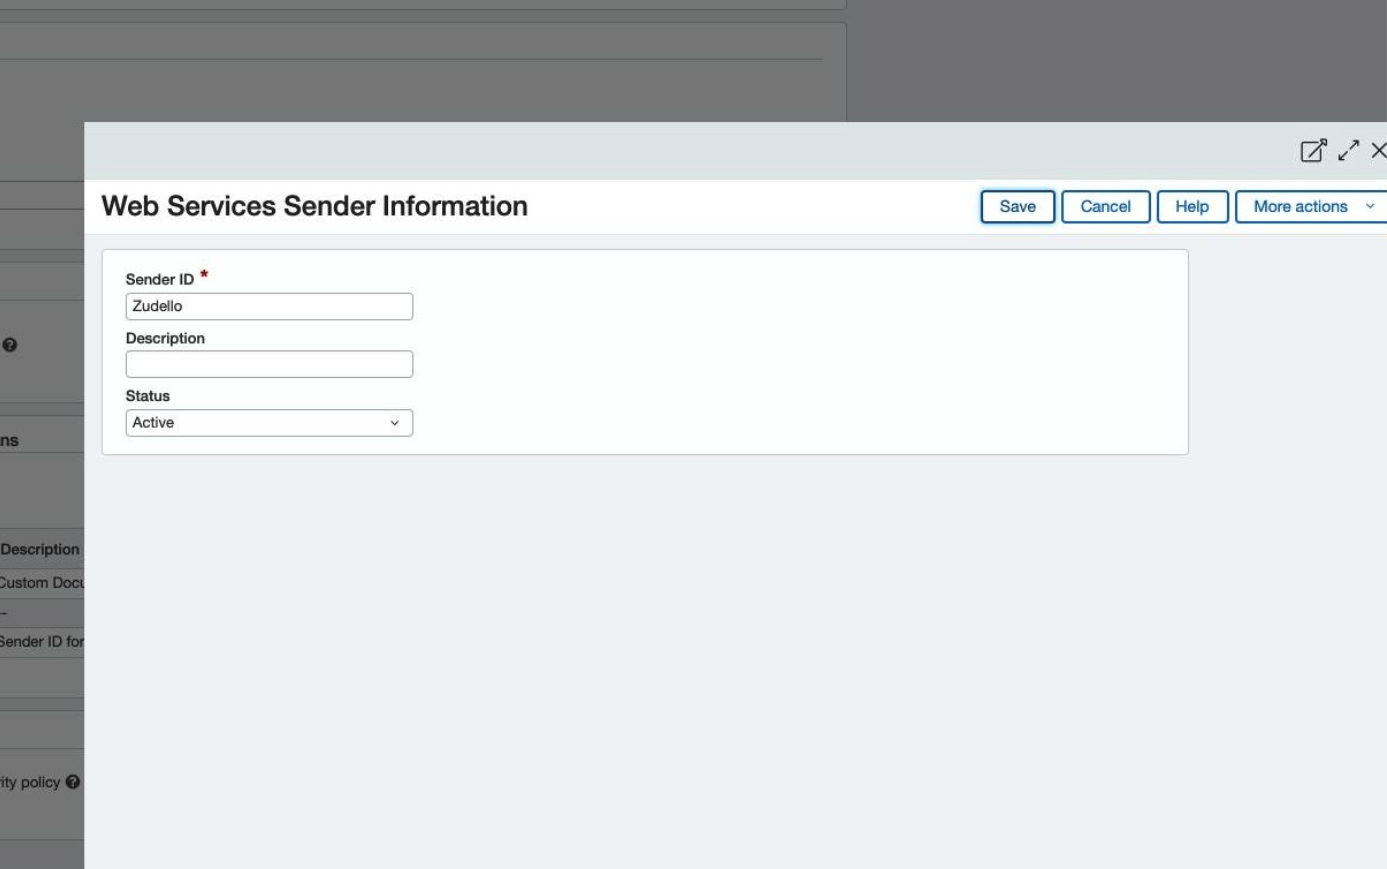
- Enter the following details
- Sender ID: Zudello
- Description: Zudello Integration
- Status: Active
- Click Save
Step 3: Create a role with necessary permissions
Create the role
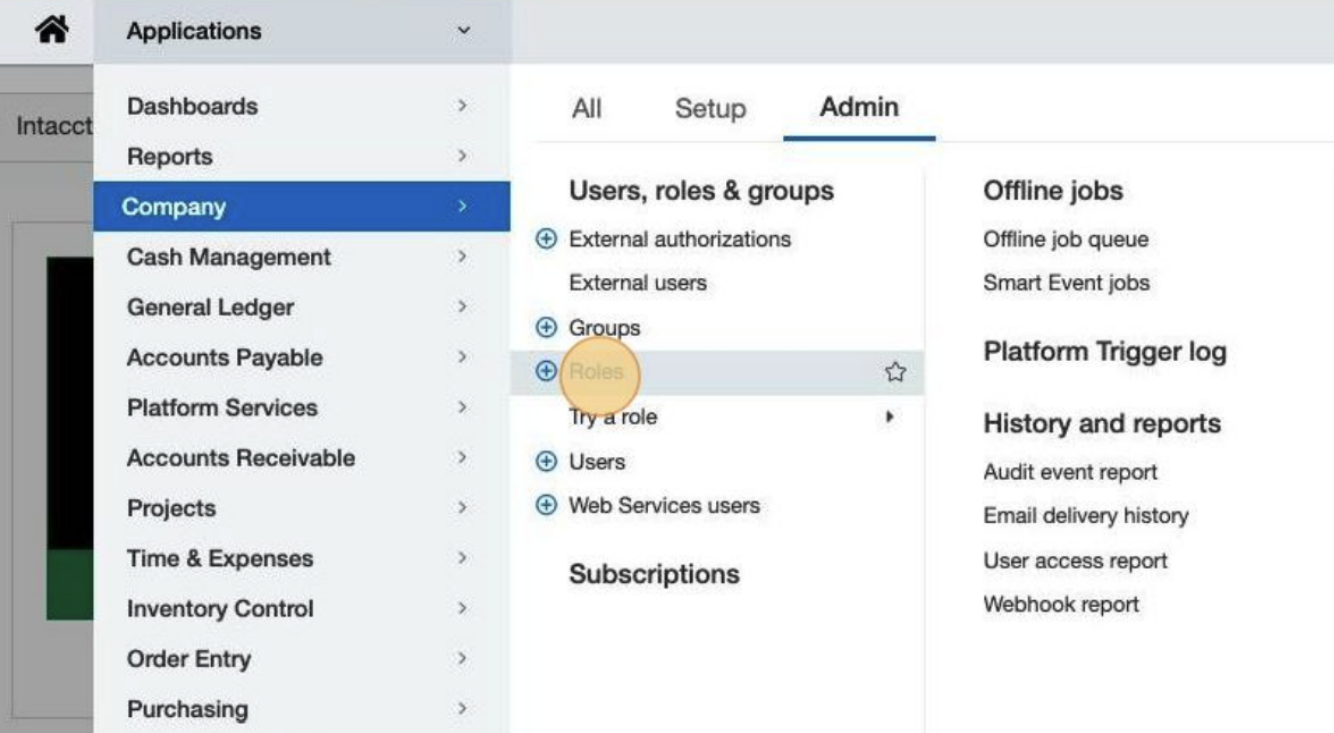
- In the Sage Intacct top menu bar, hover over Setup
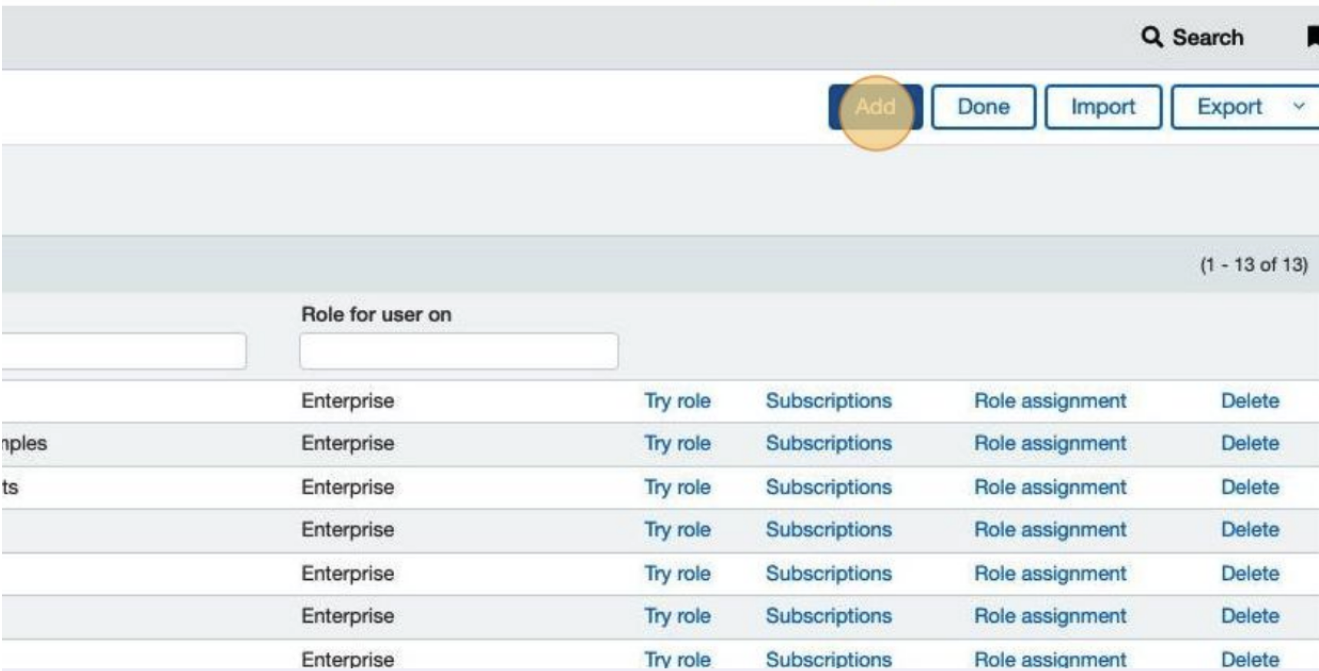
- Under Company > Admin, click Roles
- Click Add
- Enter the following details:
- Name: Zudello Integration
- Description: Integration role with full permissions
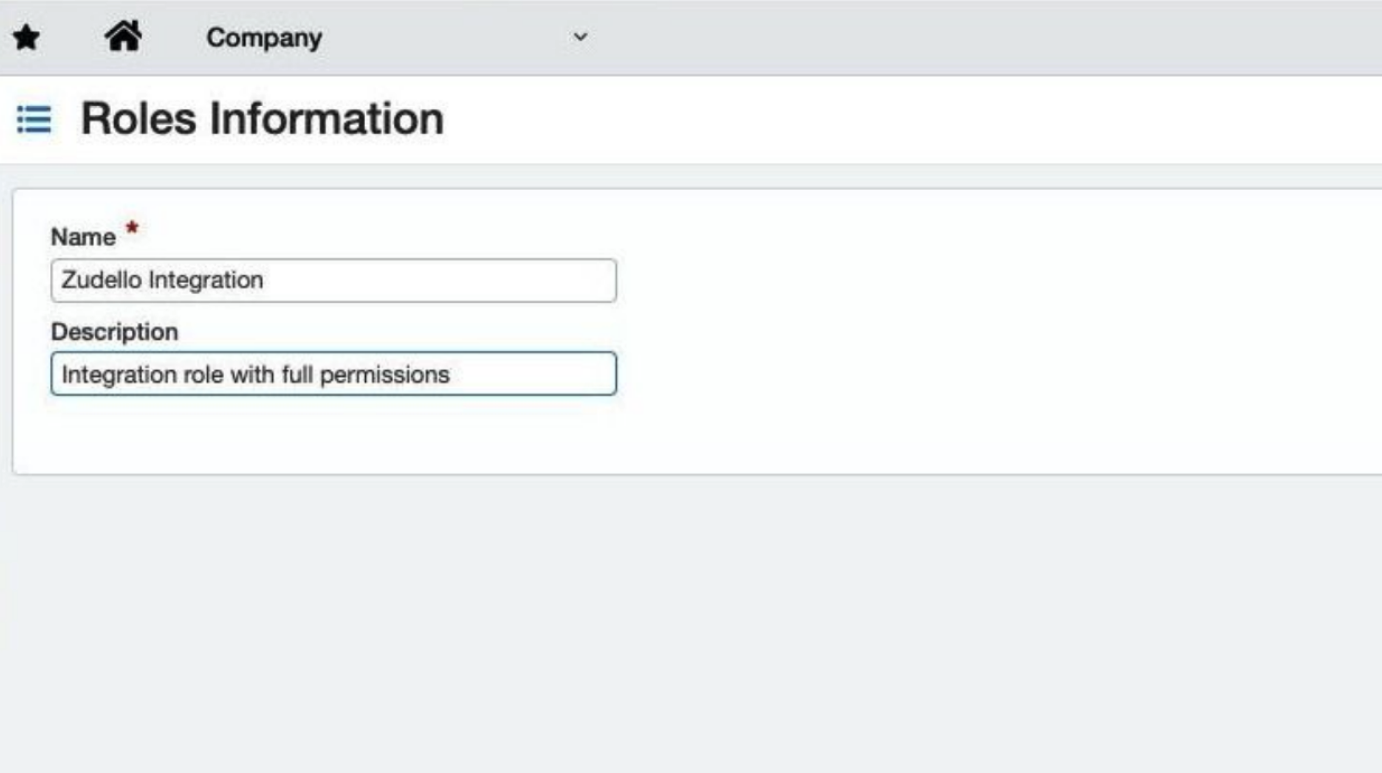
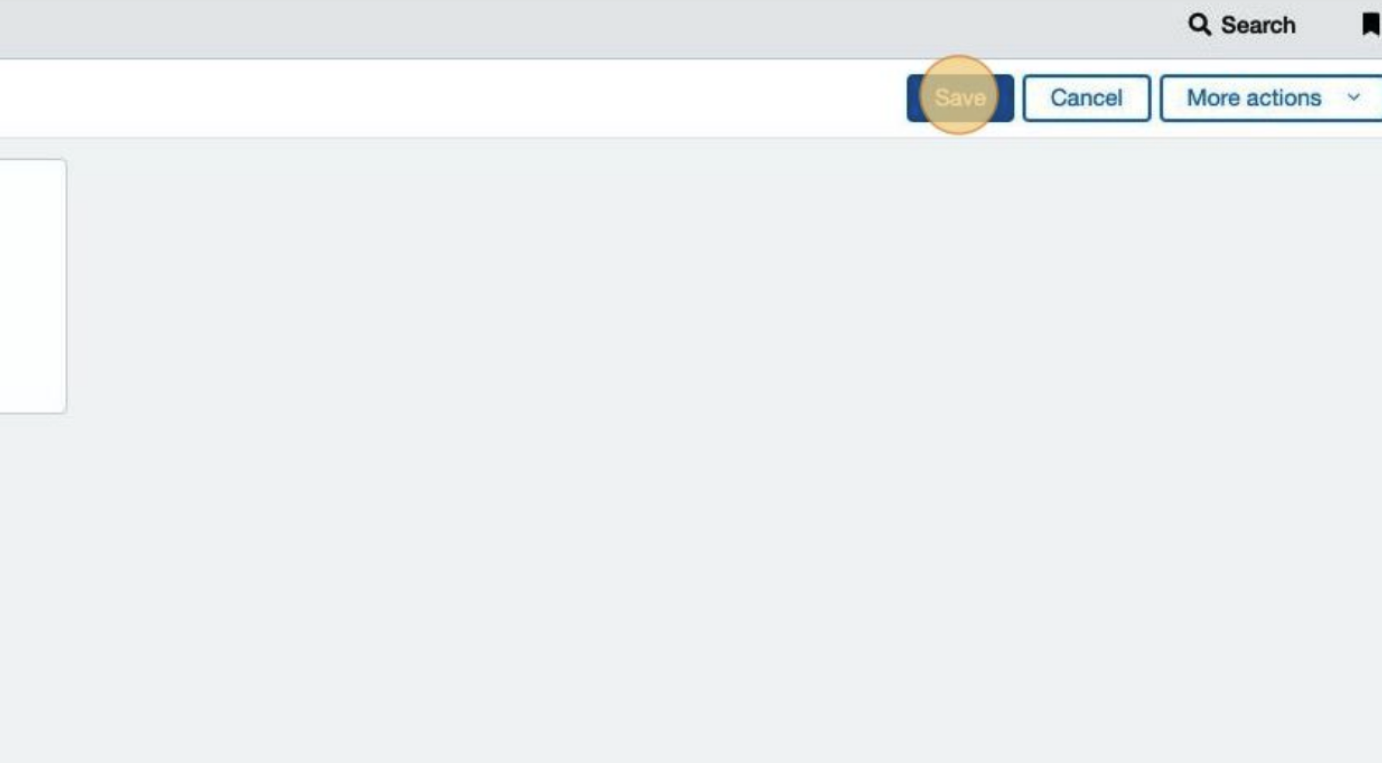
- Click Save
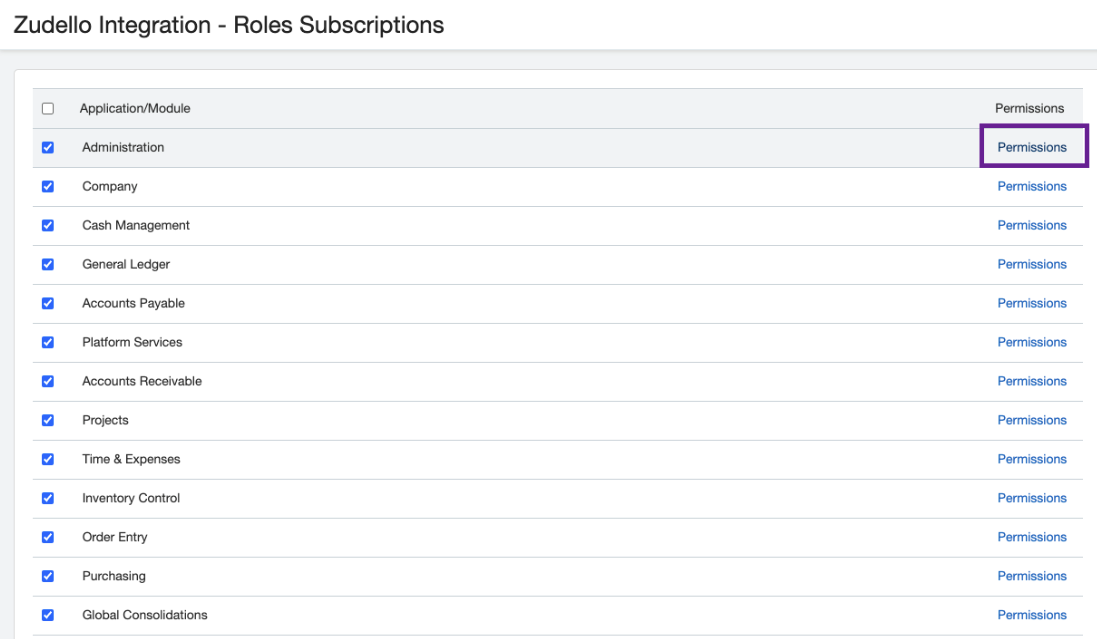
Configure permissions
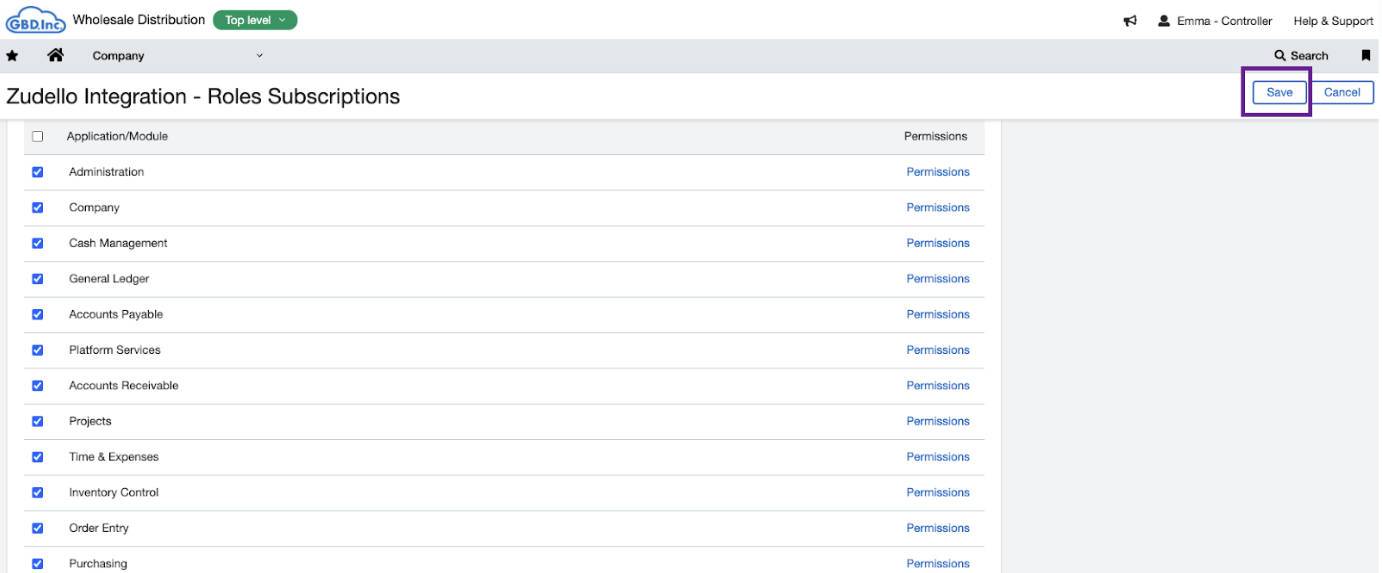
- Find each of the following role subscriptions, and configure the listed permissions.
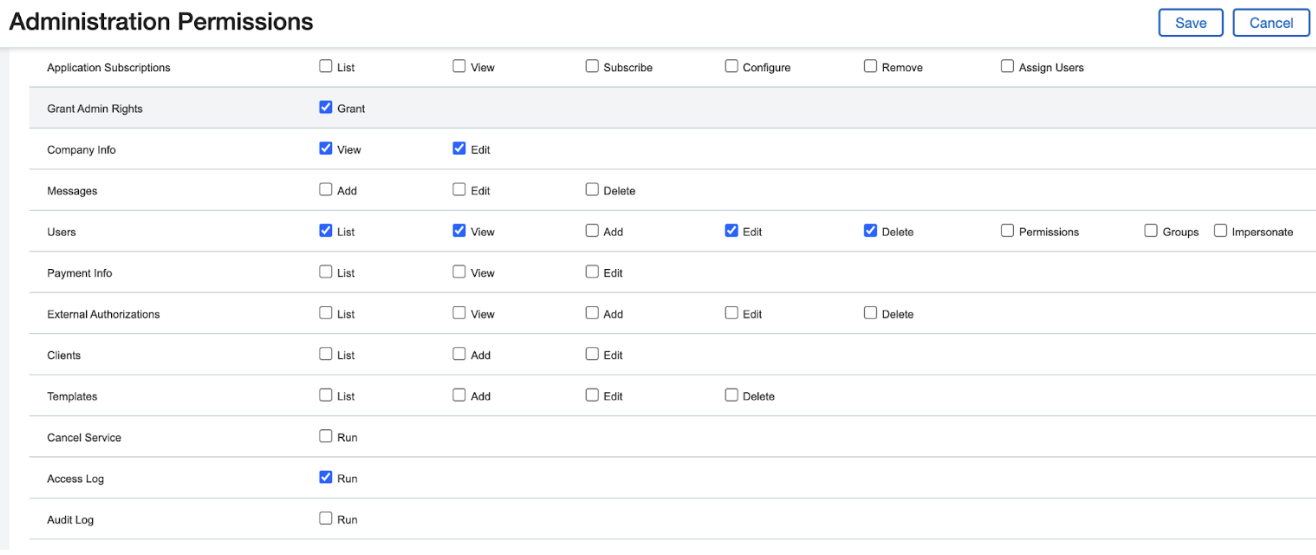
- Under Administration, add the following permissions:
- Grant Admin Rights: Grant
- Company Info: View, Edit
- Users: List, View, Edit, Delete
- Access Log: Run
- Click Save
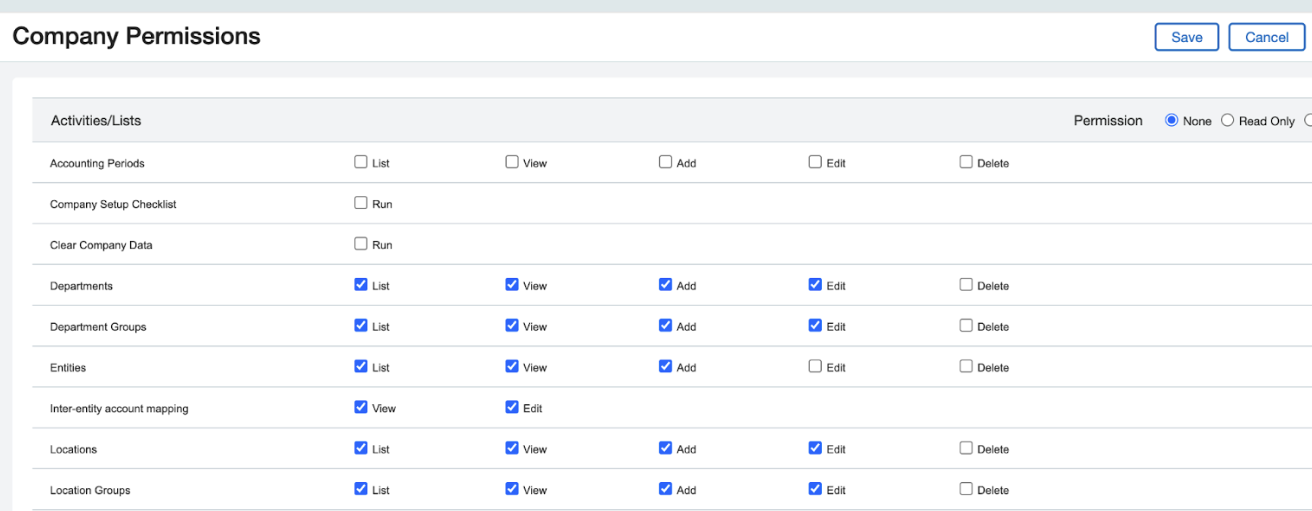
- Under Company, add the following permissions:
- Departments: List, View
- Department Groups: List, View
- Entities: List, View
- Inter-entity account mapping: View
- Locations: List, View
- Location Groups: List, View
- Class: List, View
- Class Groups: List, View
- Employees: List, View, Add, Edit
- Employee Groups: List, View
- Employee Types: List, View
- Reporting Periods: List, View
- Territories: List, View
- Territory Groups: List, View
- Document Numbering: List, View
- Contact Tax Group: List, View
- Attachment Folders: List, View, Add, Edit
- Attachments: List, View, Edit
- Memorized Reports: List
- Report Groups: List, View
- Transaction Allocations: List, View
- Transaction Currencies: List, View
- Exchange Rate Types: List, View
- Exchange Rate: List, View
- Click Save
- Under General Ledger, add the following permissions:
- Journal Entries: List, View, Add, Edit
- Tax Adjusting Entries: List, View, Add, Edit
- Approve Journal Entries: List
- Accounts: List, View
- Account Title By Entity: List, View
- Statistical Accounts: List, View
- Account Groups: List, View
- Click Save
- Under Accounts Payable, add the following permissions:
- Vendors: List, View, Add, Edit, Bank Details, Unmask bank details
- Vendor Types: List, View
- Vendor Groups: List, View
- Bills: List, View, Add, Edit, Post
- Adjustments: List, View, Add, Edit, Post
- Recurring bills: List, View, Add, Edit
- AP terms: List, View
- Tax detail: List, View
- Tax Schedule: List, View
- Tax Schedule Map: List, View
- Click Save
- Under Accounts Receivable, add the following permissions:
- Customers: List, View, Add, Edit
- Customer Groups: List, View
- Customer Types: List, View
- Projects: List, View
- Invoice: List, View, Add, Edit, Post
- Adjustments: List, View, Add, Edit, Post
- Recurring Invoices: List, View, Add, Edit
- AR terms: List, View
- Tax detail: List, View
- Tax Schedule: List, View
- Tax Schedule Map: List, View
- Click Save
- Under Projects, add the following permissions:
- Customers: List, View, Add, Edit
- Customer Groups: List, View, Add, Edit
- Customer Types: List, View, Add, Edit
- Project: List, View, Add, Edit
- Project Groups: List, View, Add, Edit
- Project Resources: List, View, Add, Edit
- Project Types: List, View, Add, Edit
- Project Status: List, View, Add, Edit
- Tasks: List, View, Add, Edit
- Task Groups: List, View, Add, Edit
- Task Resources: List, View, Add, Edit
- Items: List, View, Add, Edit
- Item Groups: List, View, Add, Edit
- Employees: List, View, Add, Edit
- Employee Groups: List, View, Add, Edit
- Time Types: List, View, Add, Edit
- Generate Invoices: Run, Add
- Invoices: List, View, Edit
- Transaction Rule: List, View, Add, Edit
- Standard Tasks: List, View, Add, Edit
- Click Save
- Under Inventory Control, add the following permissions:
- Inventory Transaction Definitions: List, View
- Vendors: List, View, Add, Edit
- Vendor Groups: List, View, Add, Edit
- Warehouses: List, View
- Warehouse Groups: List, View
- Product Lines: List, View
- Items: List, View, Add, Edit
- Item Groups: List, View
- Item GL Groups: List, View
- Item Tax Groups: List, View
- Units Of Measure: List, View, Add, Edit
- Serial Mask: List, View
- Zone: List, View
- Aisle: List, View
- Row: List, View
- Bin: List, View
- Bin Size: List, View
- Bin Face: List, View
- Lot Category: List, View
- Price Lists: List, View
- Price List Entry: List, View
- Inventory Totals: List, View
- Build and Disassemble Kits: List, View
- Inventory Transactions: List, View, Add, Edit
- Click Save
- Under Order Entry, add the following permissions:
- Order Entry Transaction Definitions: List, View, Add, Edit
- Customers: List, View, Add, Edit
- Customer groups: List, View
- Customer GL Groups: List, View
- Items: List, View
- Item Groups: List, View
- Units Of Measure: List, View, Add, Edit
- Item GL Groups: List, View
- Item Tax Groups: List, View
- Warehouses: List, View
- Price Lists: List, View
- Tax Detail: List, View
- Tax Schedule: List, View
- Tax Schedule Map: List, View
- Contacts: List, View
- Recurring Transactions: List, View, Add, Edit
- Order Entry Transactions: List, View, Add, Edit
- Payment Defaults: List, View
- Click Save
- Under Purchasing, add the following permissions:
- PO Transaction Definitions: List, View, Add, Edit
- Vendors: List, View, Add, Edit
- Vendor Groups: List, View
- Items: List, View, Add, Edit
- Item Groups: List, View
- Units of Measure: List, View, Add, Edit
- Item GL Groups: List, View
- Item Tax Groups: List, View
- Warehouses: List, View
- Price Lists: List, View
- Tax Detail: List, View
- Tax Schedule: List, View
- Tax Schedule Map: List, View
- Contacts: List, View
- Recurring Transactions: List, View, Add, Edit
- Purchasing Transactions: List, View, Add, Edit
- Click Save
- Under Contracts, add the following permissions:
- Process Contract Schedules: List, View, Process, Contracts
- Click Save
- Under Taxes, add the following permissions:
- Tax Solutions: List, View
- Tax Records: List, View
- Click Save
- After configuring all permissions, click Save at the top of the Role Subscriptions page to save the role
Step 4: Create a web user
The last step is to create a Web User, which will allow Zudello to connect to your Sage Intacct instance.
- Hover over Setup
- Under Company > Admin, click Web Services users
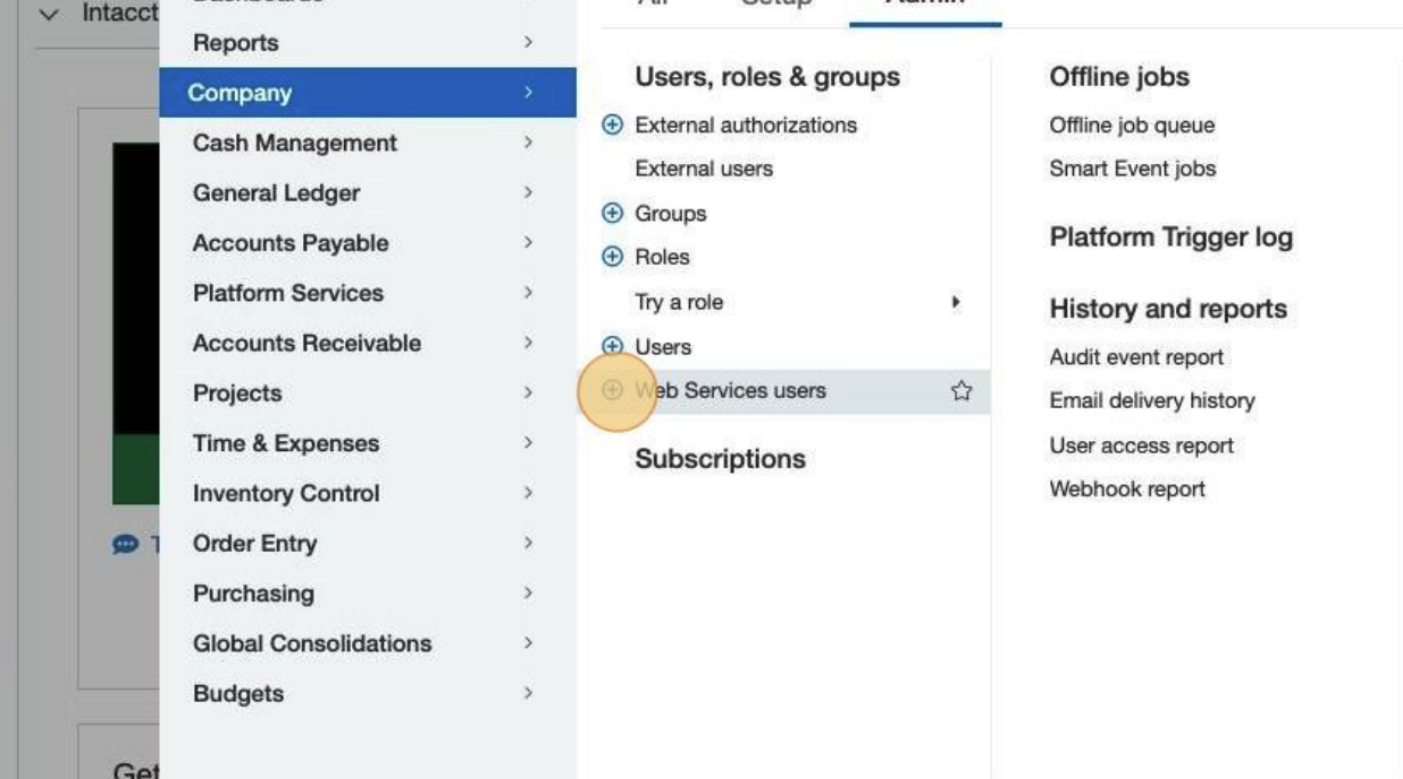
- Click Add
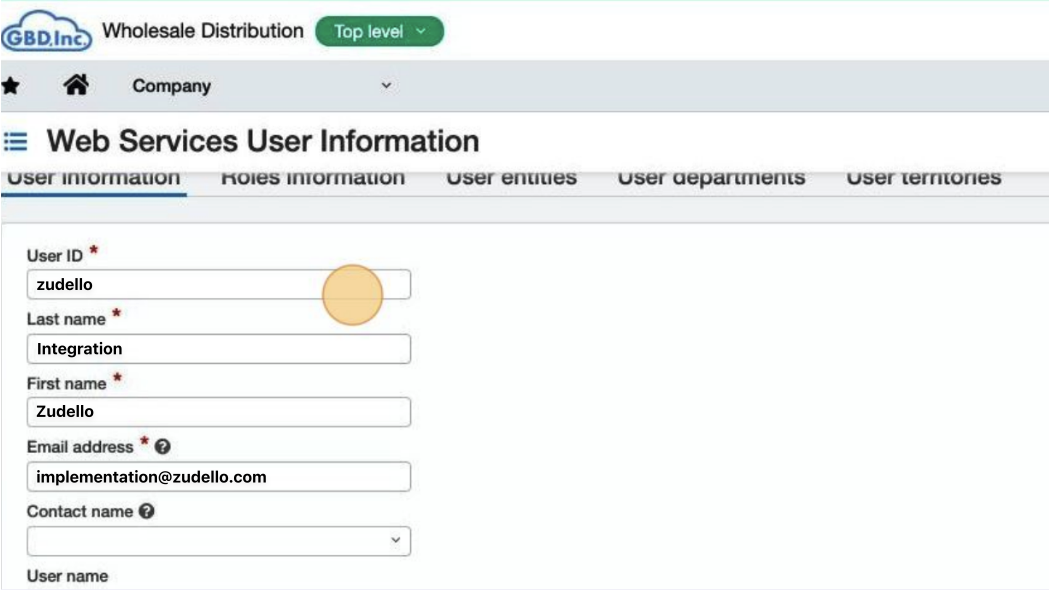
- Enter the following information:
- User ID: zudello
- Last name: Integration
- First name: Zudello
- Email address: implementation@zudello.com
- Under User type, select Business
- Under Admin privileges, select Full

- Click Save
After saving, an email containing the user password will be sent to the email address you entered.
Please advise your Zudello implementation consultant that you have create the user so they can check for the email.
Assign the role to the user
- Under Web Services User Information, click the Roles information tab
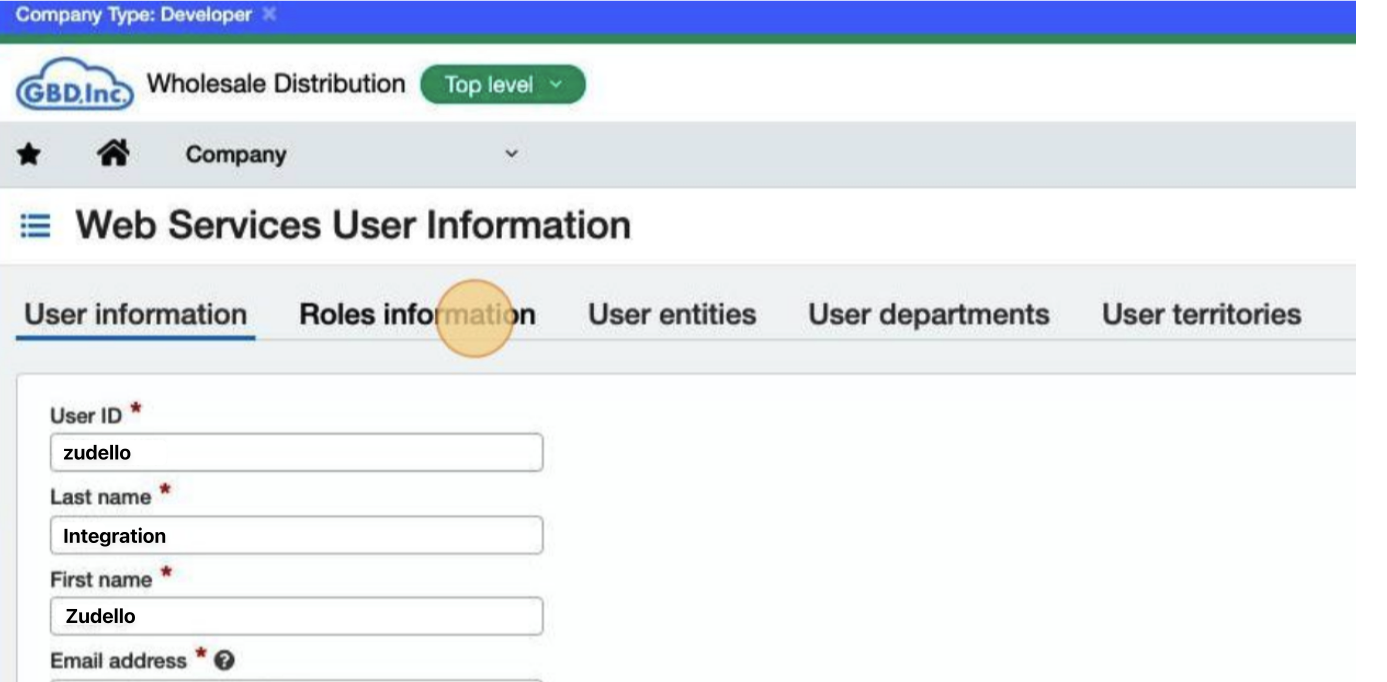
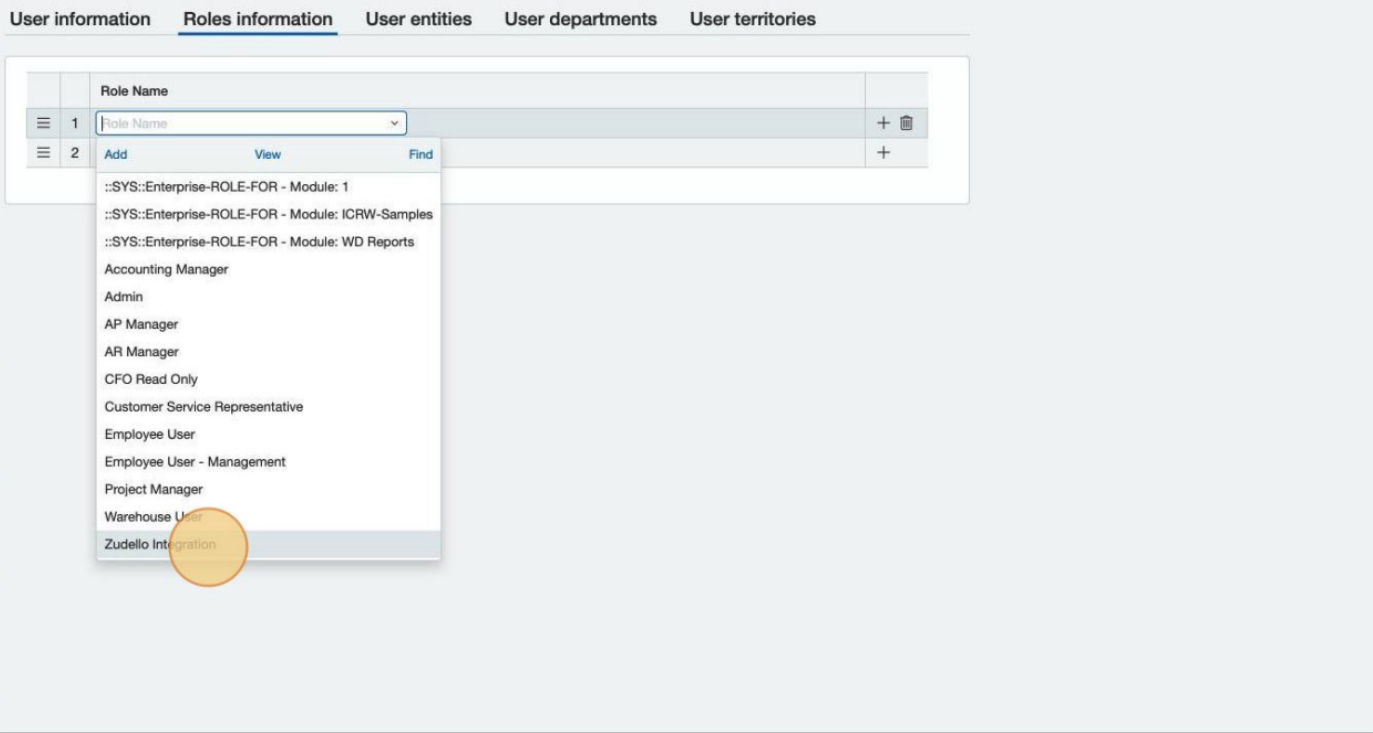
- In the first row of the Role Name column, select the role you created in Step 3
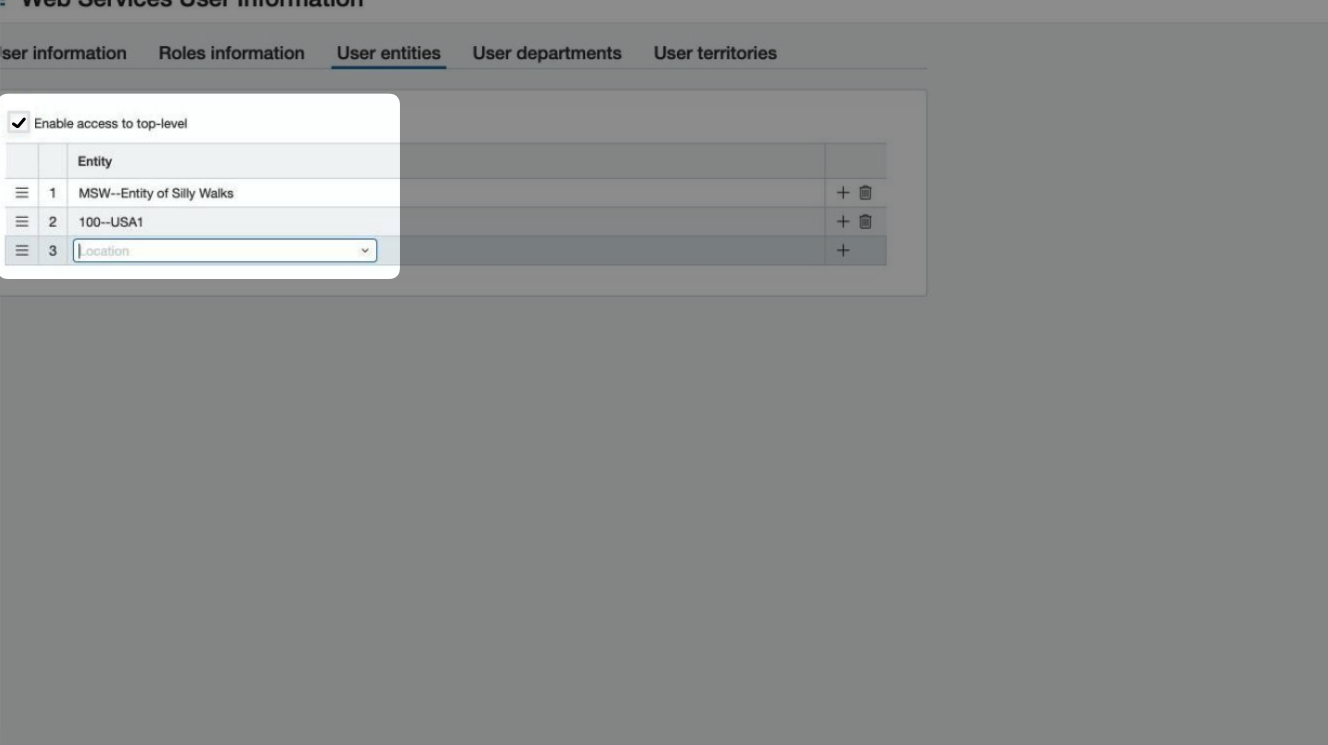
- Click the User entities tab
- Ensure the user has access to all entities that will use Zudello
- Click Save
Summary of credentials
You have now generated the credentials required to connect Sage Intacct to Zudello:
- User ID - The web user ID you created
- Password - Sent to implementation@zudello.com after creating the user
Next steps
Provide the user ID to your Zudello Implementation consultant or implementation@zudello.com. They will then check for the system generated password and complete the setup.
Need help?
If you encounter any issues during this process, contact your Zudello Implementation consultant or Zudello support for assistance.