Netsuite connection requirements
This guide walks you through how to generate the authentication credentials required to connect your Netsuite account to Zudello. Once generated, you'll need to provide these credentials to your Zudello Implementation consultant or implementation@zudello.com
Before you start
You'll need:
- Administrator access to your Netsuite account
- Notepad or document to securely store the generated credentials
Some authentication tokens can only be viewed once and cannot be retrieved later. Make sure to copy and save each credential immediately and securely.
Once you've finished
By the end of this guide, you'll have generated the following six credentials:
- Account ID
- Sub Domain
- Consumer Key
- Consumer Secret
- Token
- Token Secret
Step 1: Enable web services in Netsuite
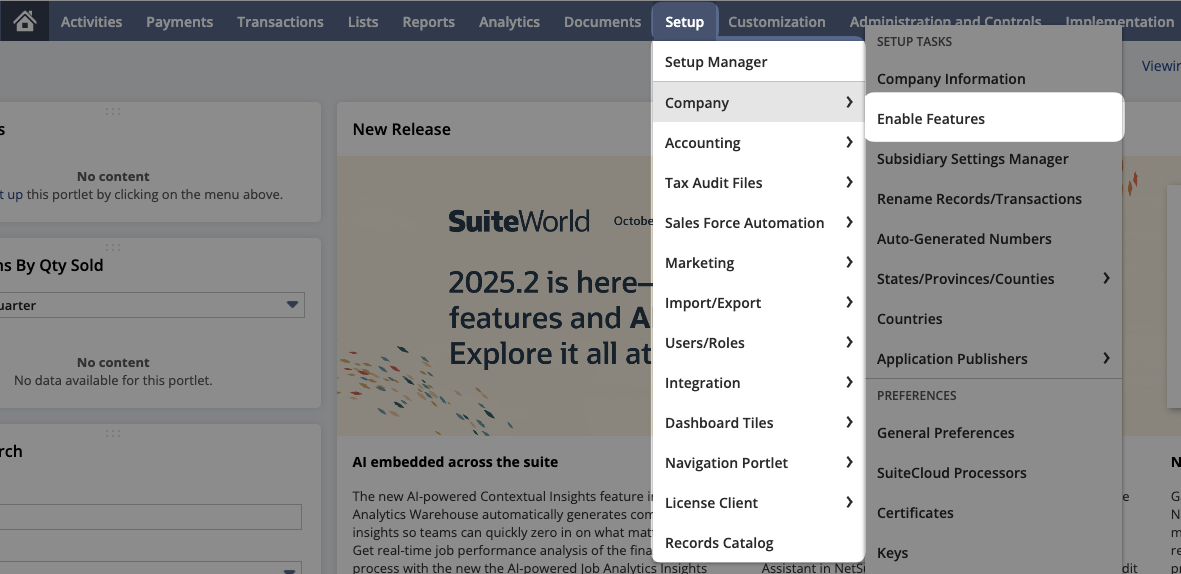
- In Netsuite, hover over Setup in the menu bar
- Click Company, then Enable Features
- Click the SuiteCloud tab at the top of the page
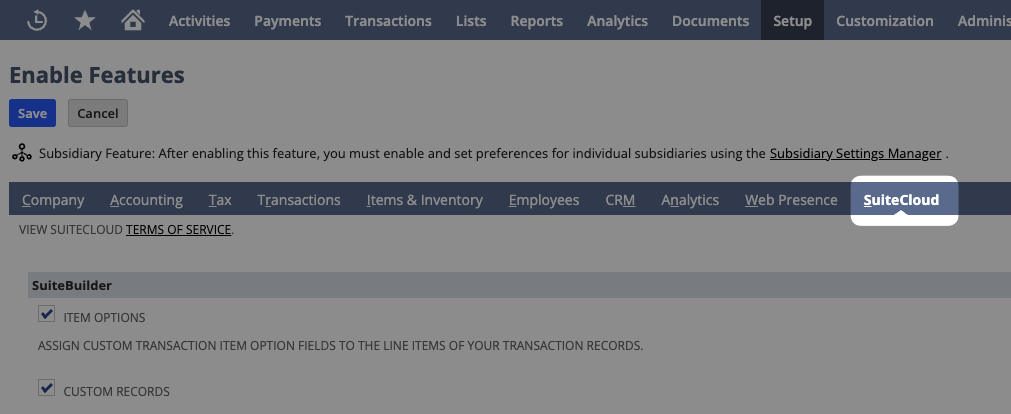
- Ensure these three options are checked:
- Under SuiteTalk (Web Services)
- SOAP (Web Services)
- REST Web Services
- Under Manage Authentication
- Token-Based Authentication
- Under SuiteTalk (Web Services)
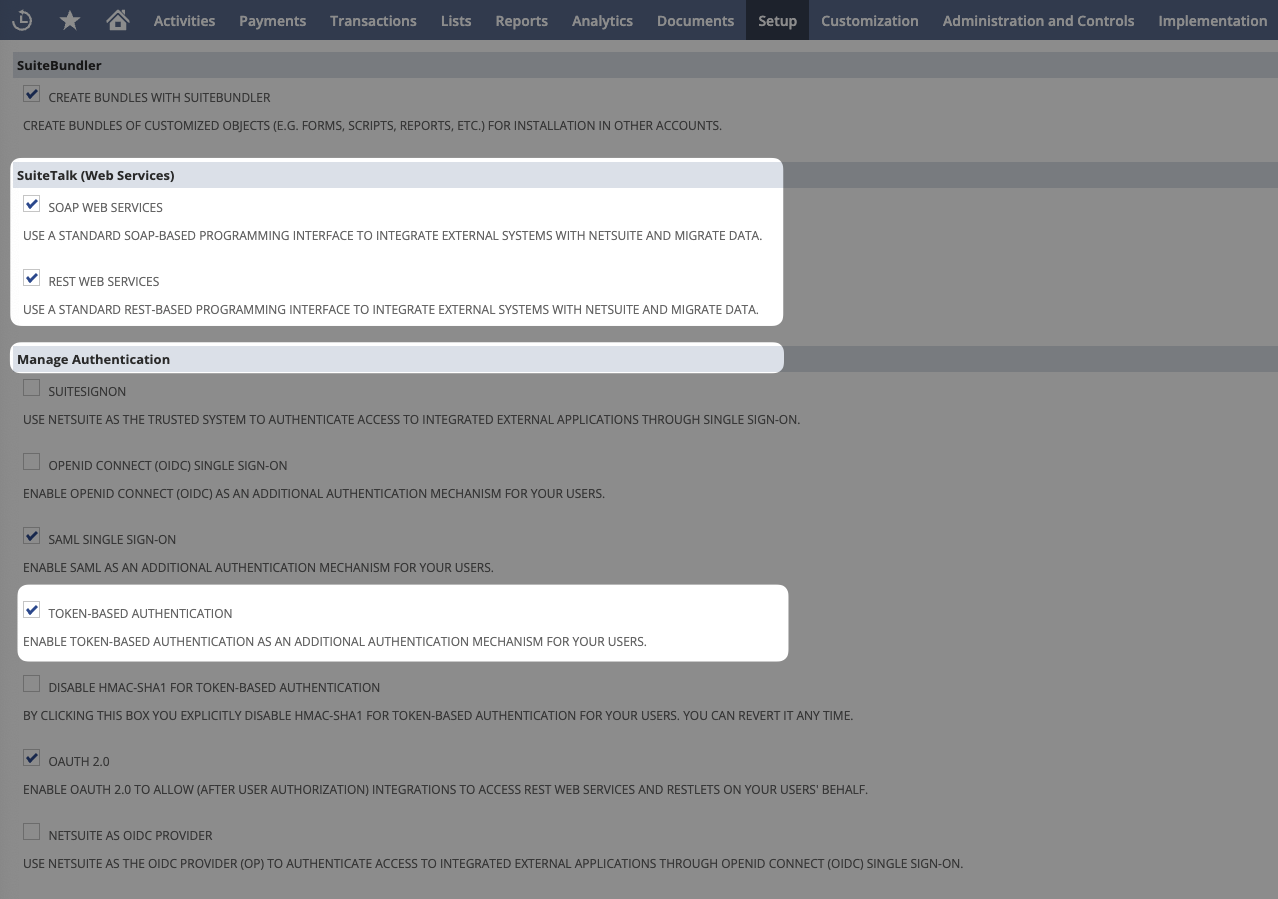
- Click Save
Step 2: Create the integration in Netsuite
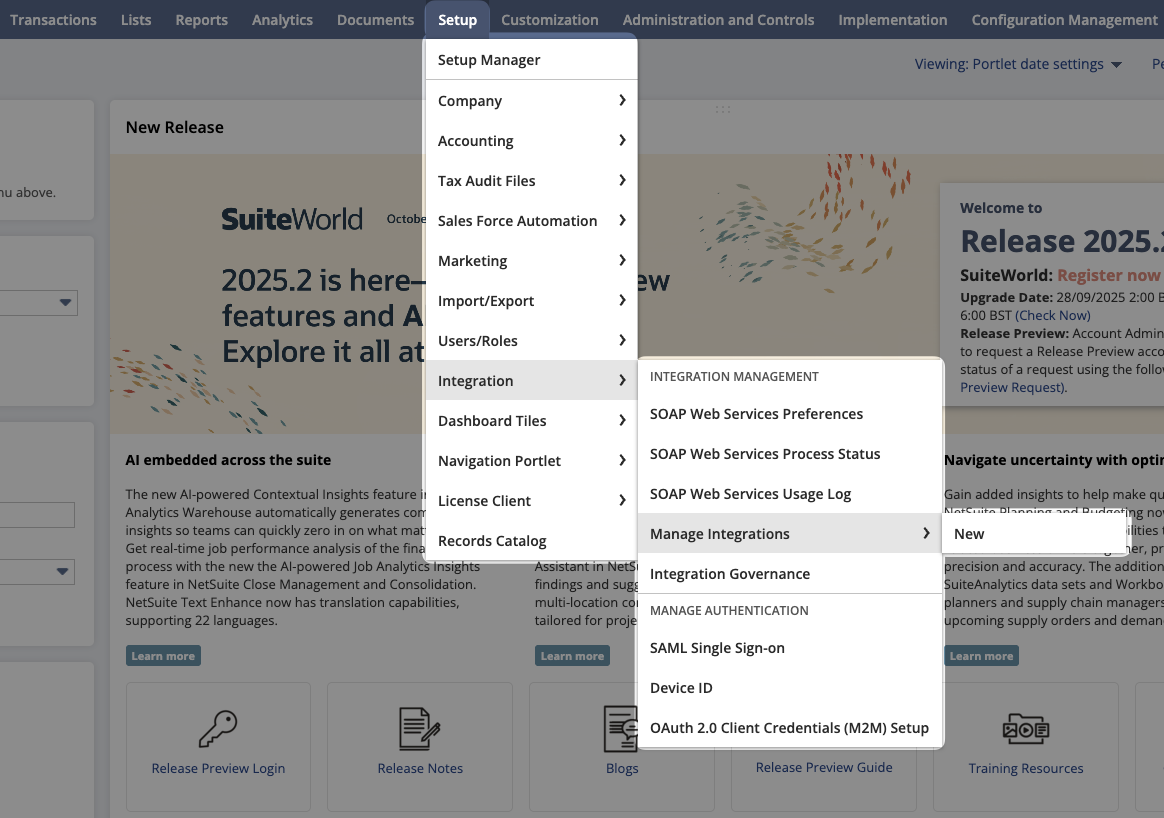
- In Netsuite, hover over Setup > Integrations > Manage Integrations
- Click New
- Give your integration a name (e.g. Zudello)
- Under Authentication, ensure the following fields are deselected:
- User Credentials
- TBA Authorization Flow
- Authorization Code Grant
- Select Token-Based Authentication
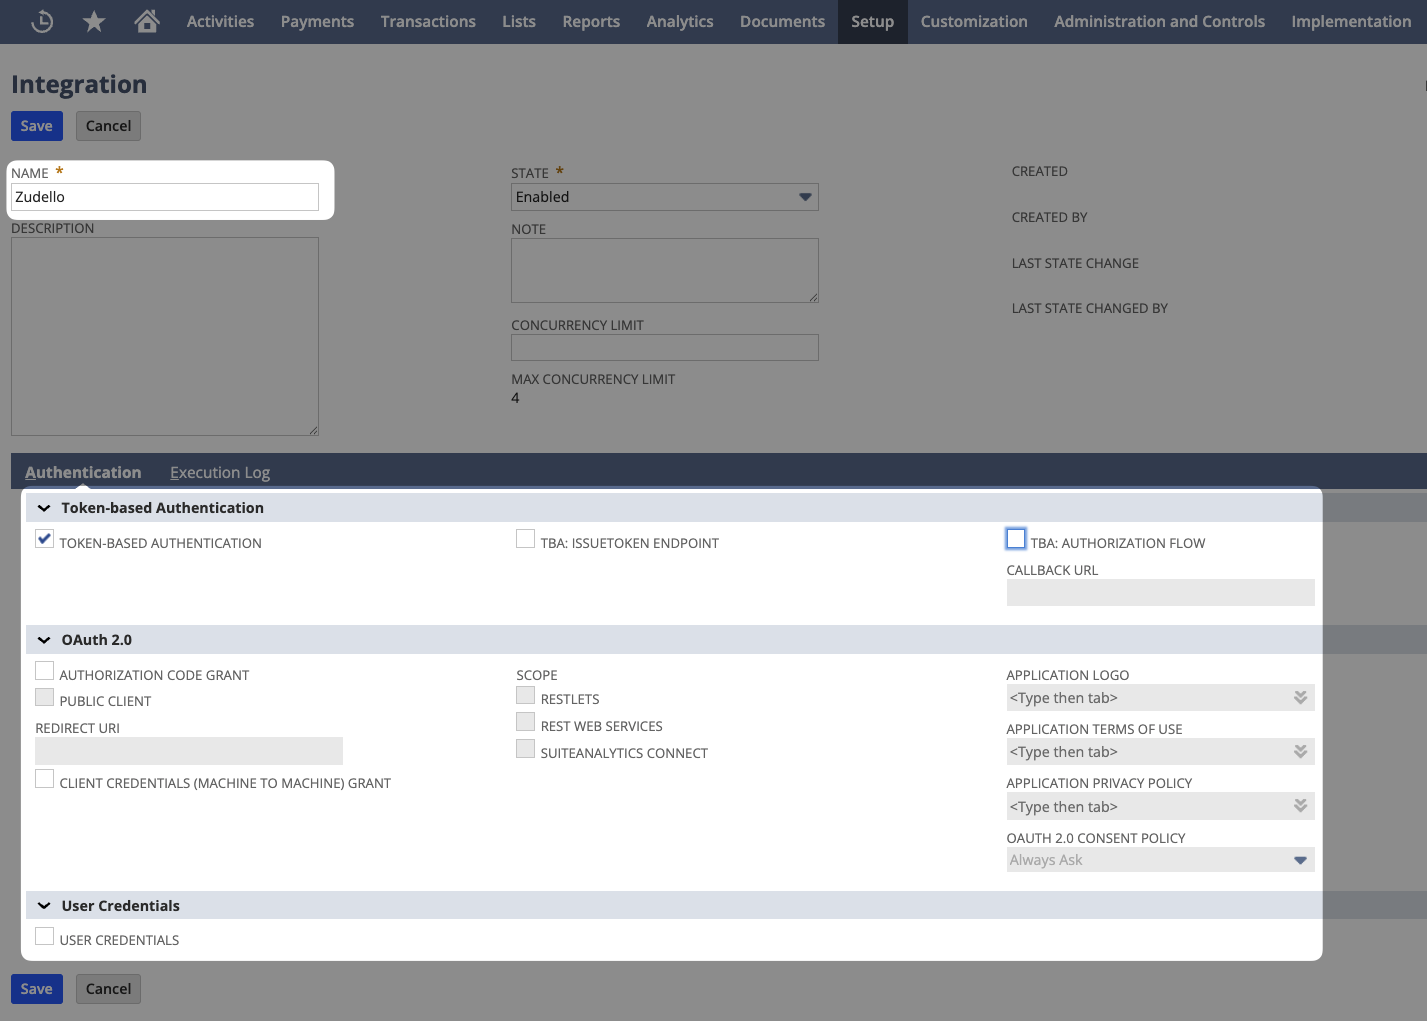
- Click Save
After saving, you'll see the Consumer Key and Consumer Secret. Save these details securely.
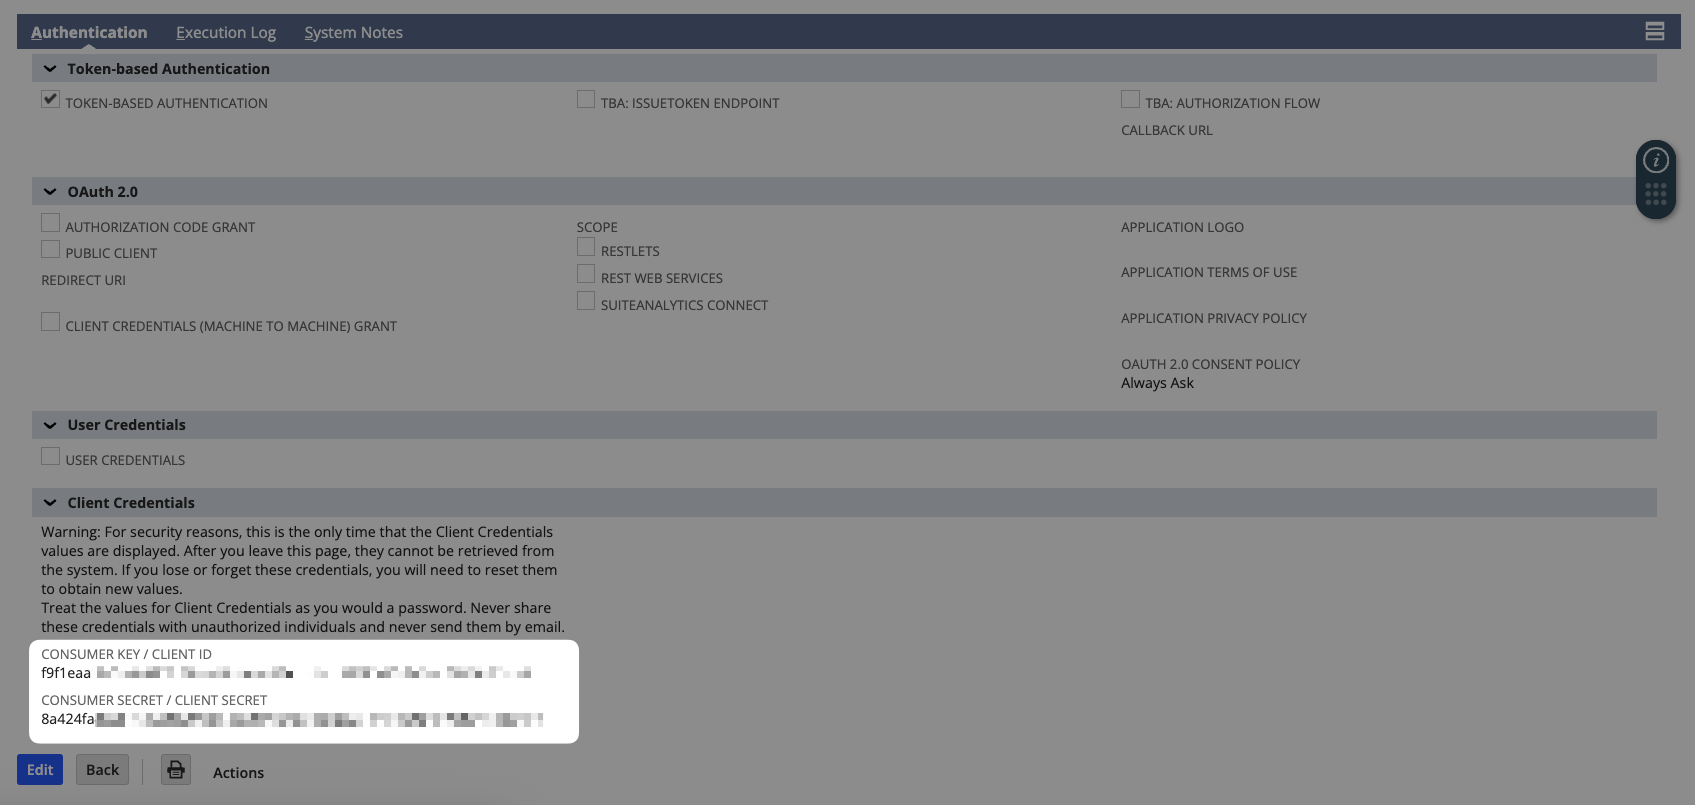
Copy the Consumer Key and Consumer Secret immediately and save them securely. These values cannot be retrieved again once you navigate away from this page.
Step 3: Get your account ID and sub domain
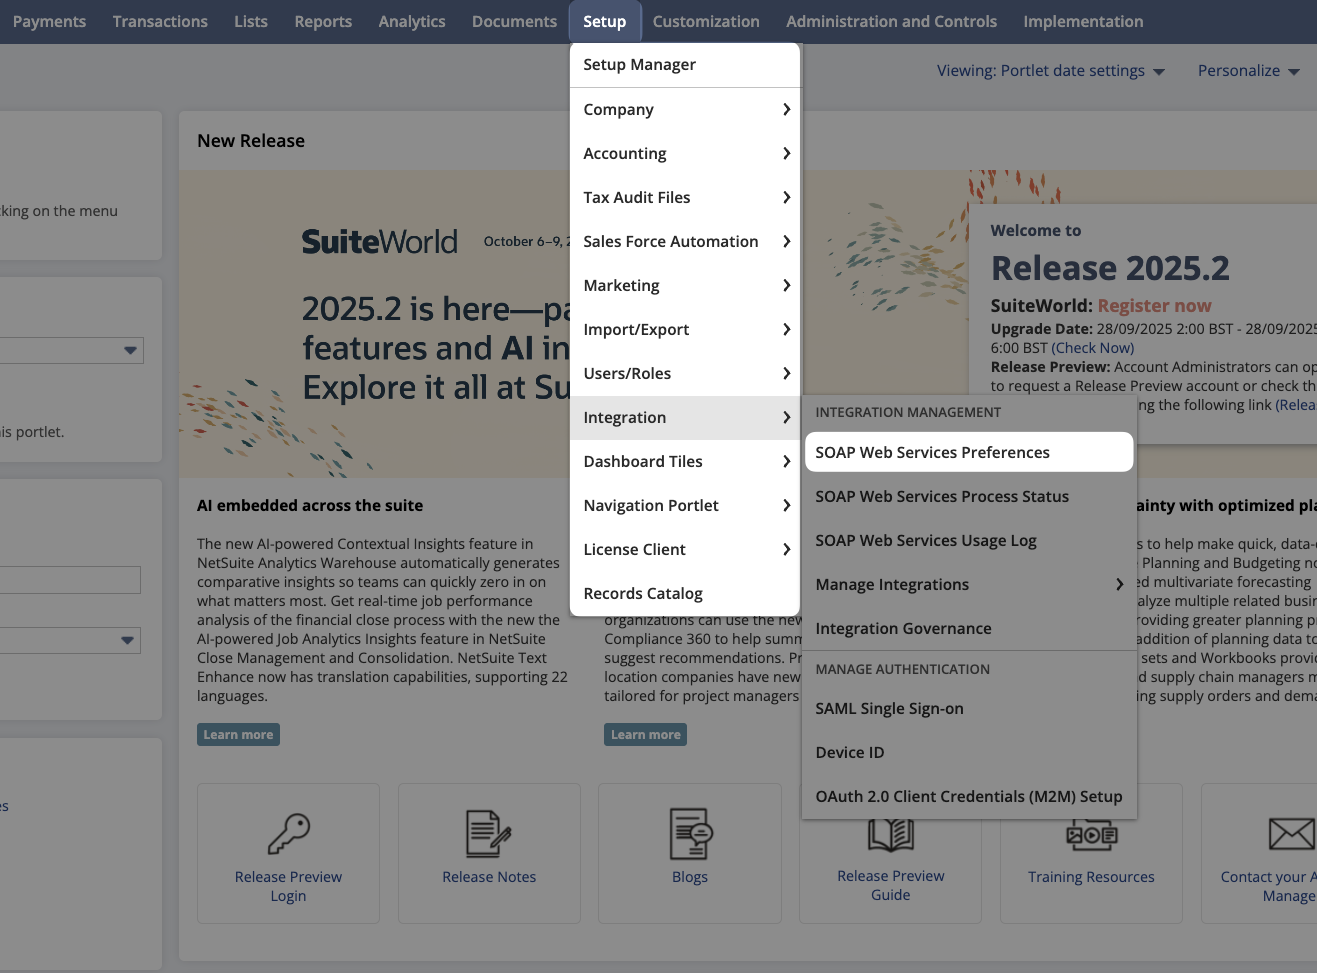
- In Netsuite, hover over Setup > Integration
- Click SOAP Web Services Preferences
- Copy the Account ID
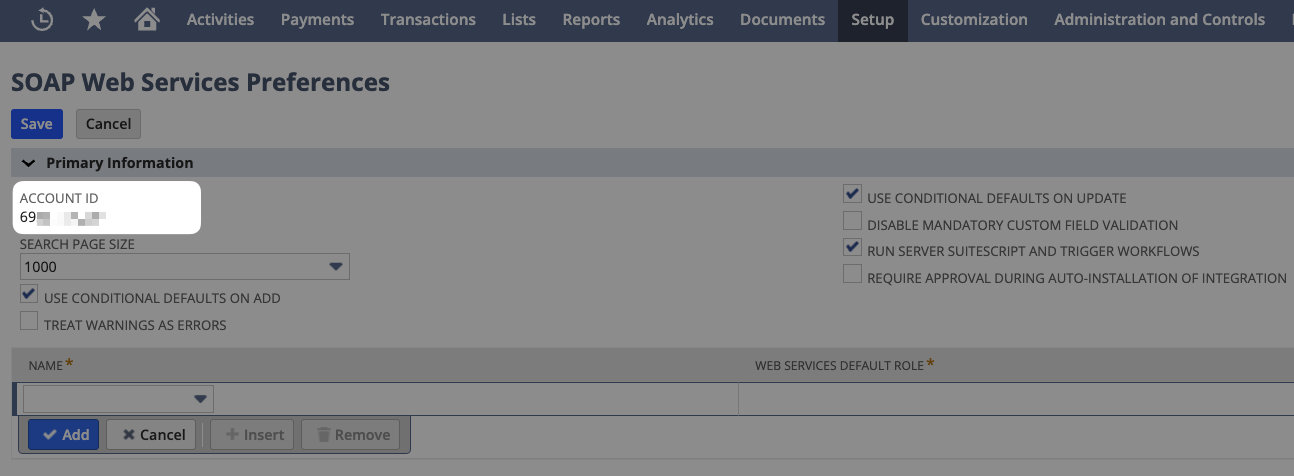
- Copy the URL of the page (everything in the address bar of your browser). The Sub Domain is the value before .app.netsuite.com
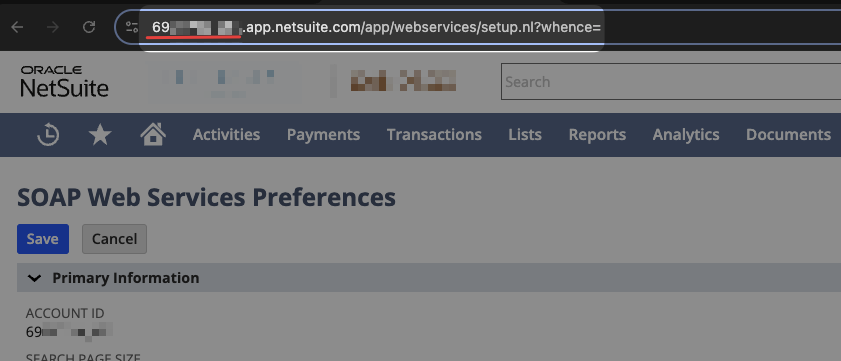
- Save the Account ID and Sub Domain securely.
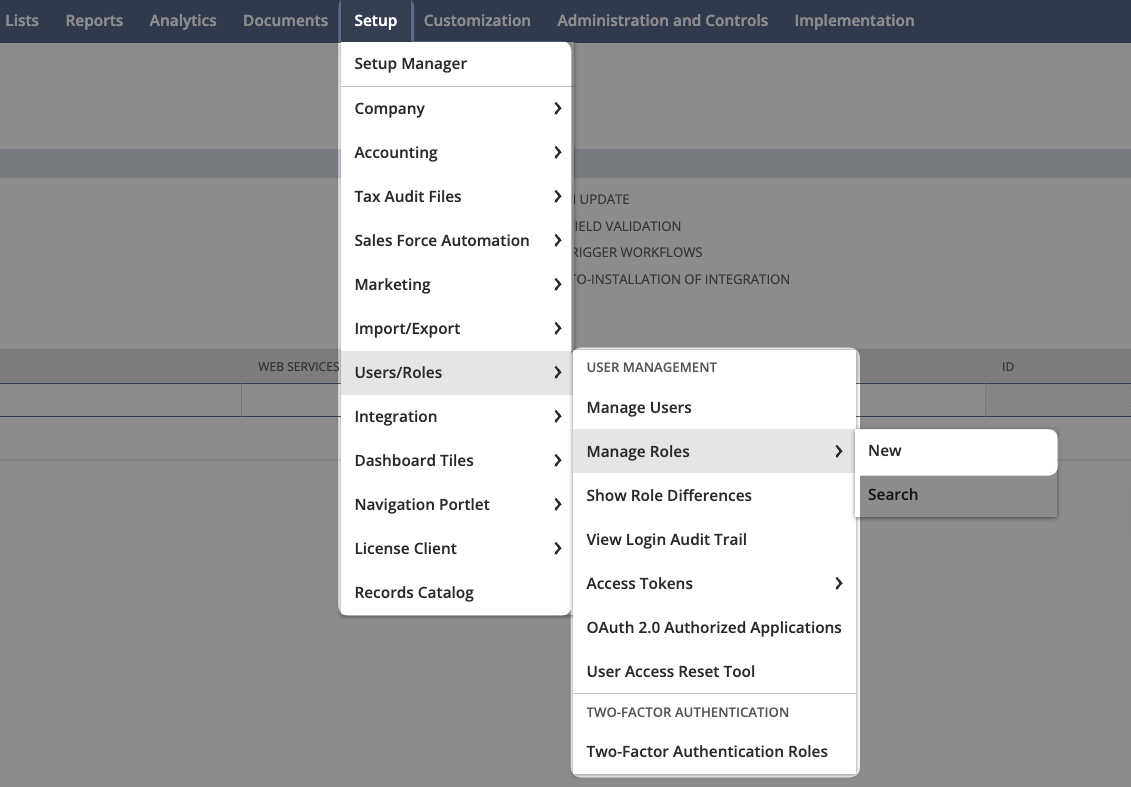
Step 4: Create a role for the integration
- In Netsuite, hover over Setup > Users/Roles > Manage Roles
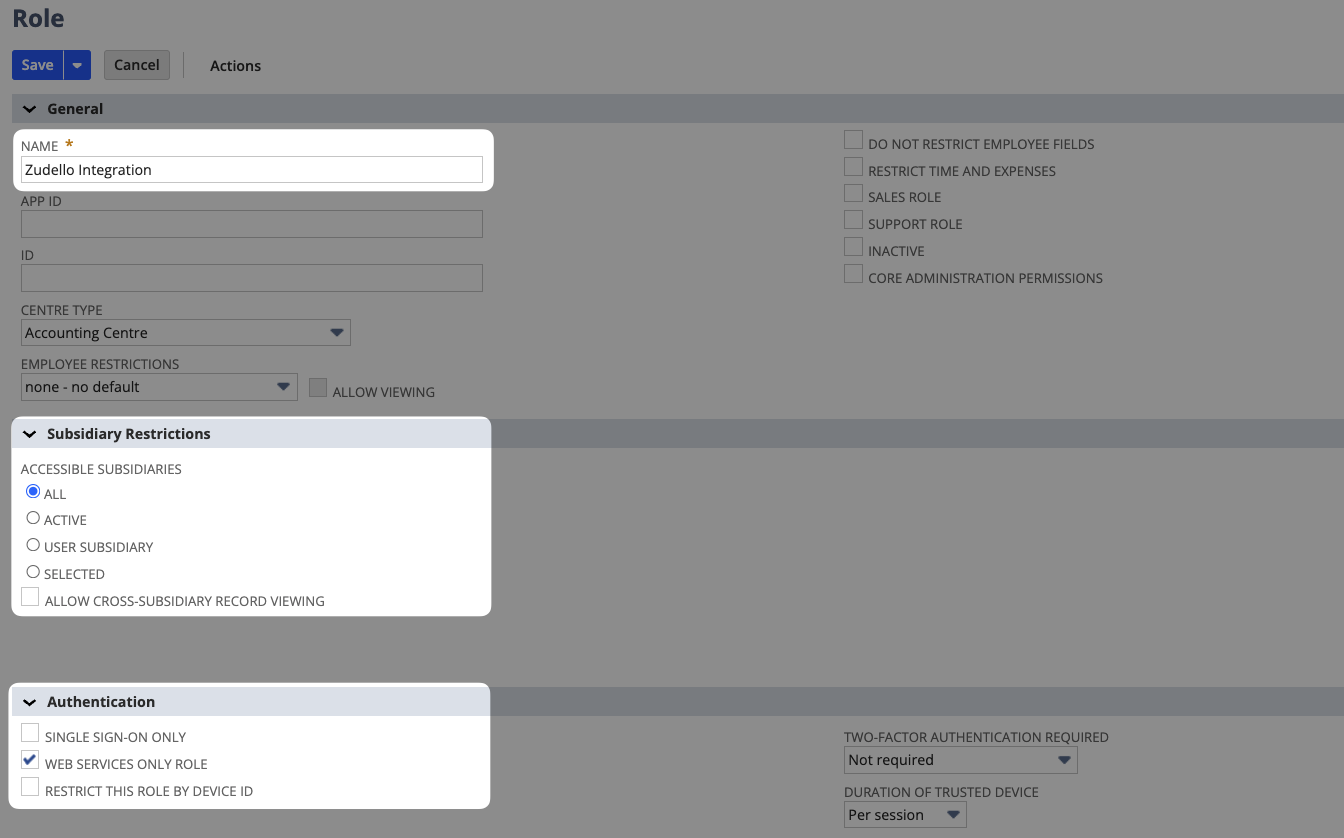
- Click New
- Give your role a name (e.g. Zudello Integration)
- Select the appropriate Subsidiary (select ALL to access all subsidiaries, or select specific subdiaries to limit access)
- Under Authentication, select Web Service Only Role
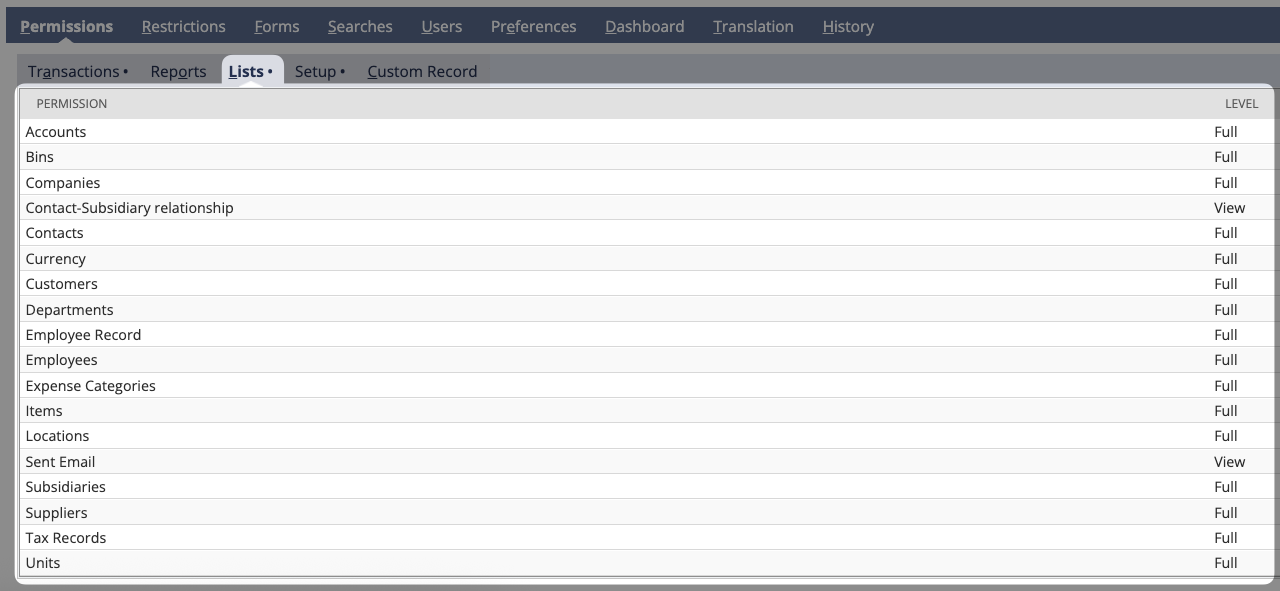
- Scroll down to the Permissions section
- Add the following permissions and set them all to Full:
Some fields may only offer the View option. For these fields simply set them to View.
- Transactions:
- Adjust Inventory
- Bill Purchase Orders
- Bills
- Build Assemblies
- Enter Vendor Credits
- Find Transaction
- Fulfil Orders
- Invoice Sales Orders
- Item Fulfillment
- Item Receipt
- Journal Approval
- Make Journal Entry
- Purchase Order
- Receive Order
- Sales Order
- Sales Order Approval
- Set Up Budgets
- Transfer Funds
- Transfer Inventory
- Transfer Order
- Transfer Order Approval
- Vendor Bill Approval
- Vendor Return Authorization
- Vendor Returns

- Reports:
- Budget
- Granting access to Reports
- SuiteAnalytics Workbook

- Lists:
- Accounts
- Bins
- Classes
- Companies
- Contact-Subsidiary Relationship
- Contacts
- Currency
- Customers
- Departments
- Employee Record
- Employees
- Expense Categories
- Items
- Locations
- Sent Email
- Subsidiaries
- Suppliers (Vendors)
- Tax Records
- Units
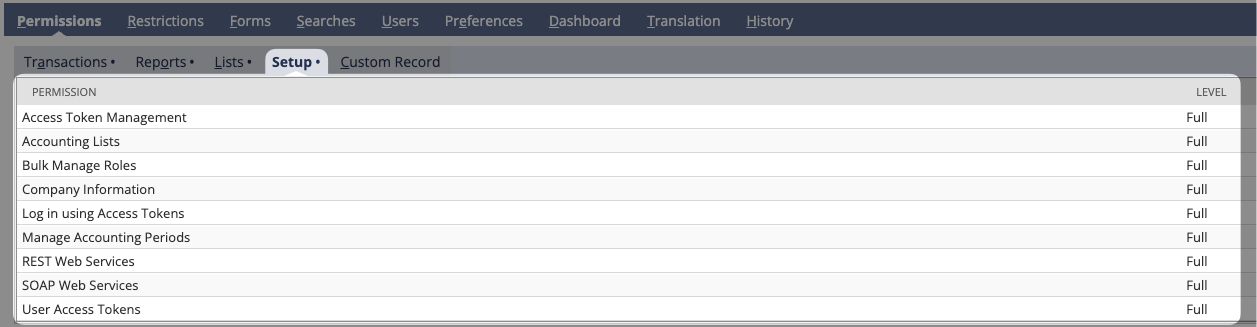
- Setup:
- Access Token Management
- Accounting Lists
- Bulk Manage Roles
- Company Information
- Log in using Access Tokens
- Manage Accounting Periods
- REST Web Services
- SOAP Web Services
- User Access Tokens
- Once all permissions have been added, click Save
Step 5: Assign a user to the role
You can either:
- Create a new user specifically for the integration (recommended)
- Assign an existing user to the role
- Once you have created or chosen the user to assign to the role, hover over Setup > Users/Roles > Manage Users
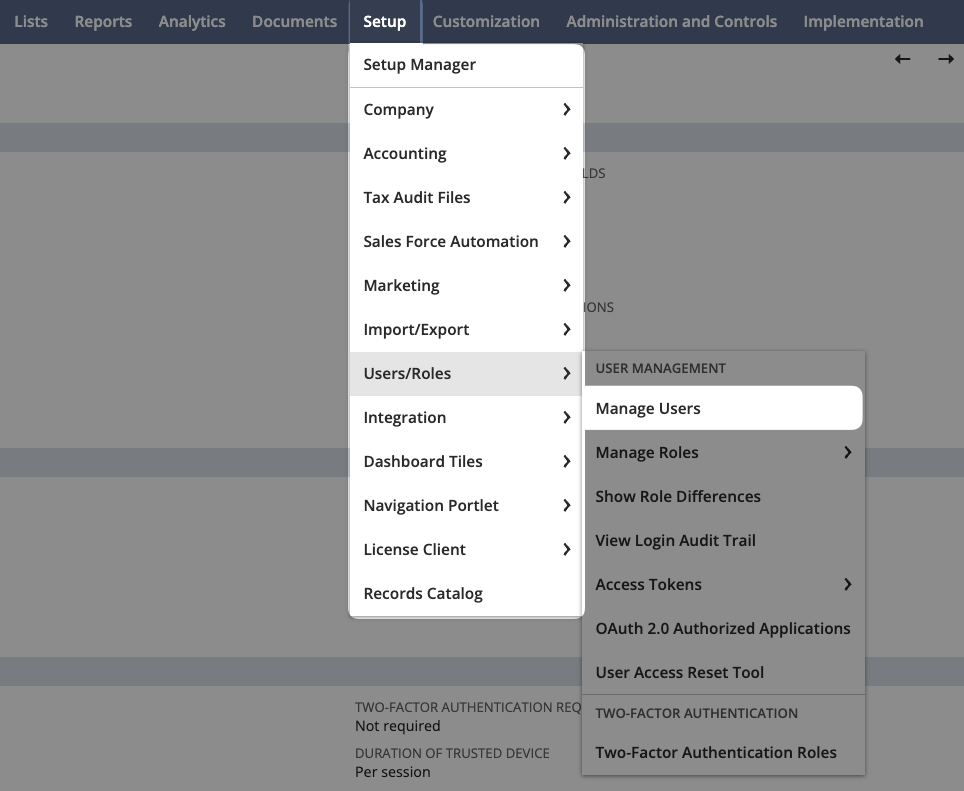
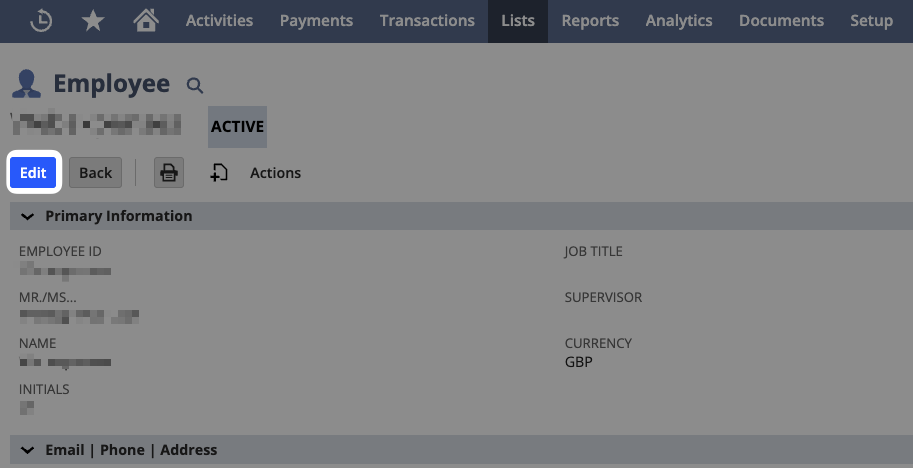
- Find and click on the username you want to assign
- Click the blue Edit button at the top of the page
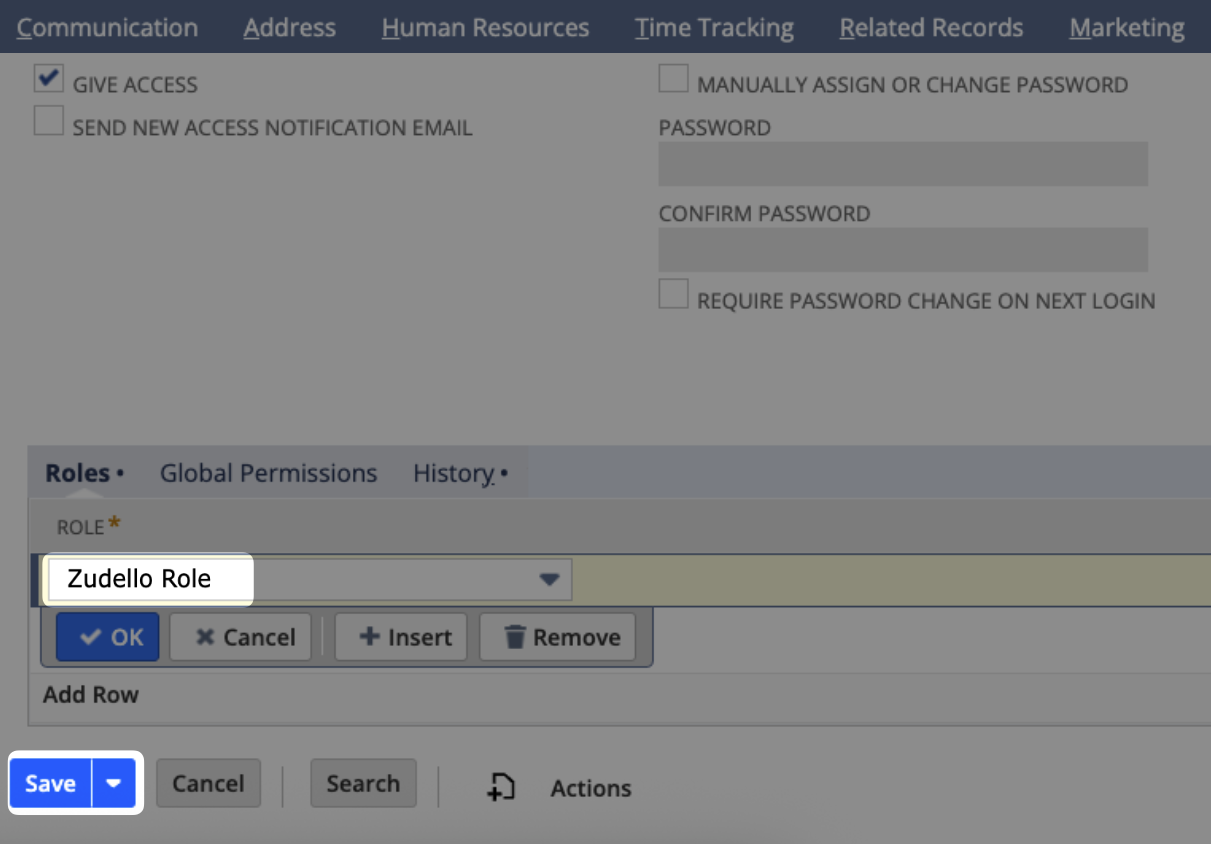
- Click the Access tab in the submenu
- In the Roles section, select the integration role you created
- Click Save
Step 6: Generate access tokens
This final step generates the Token and Token Secret required for authentication.
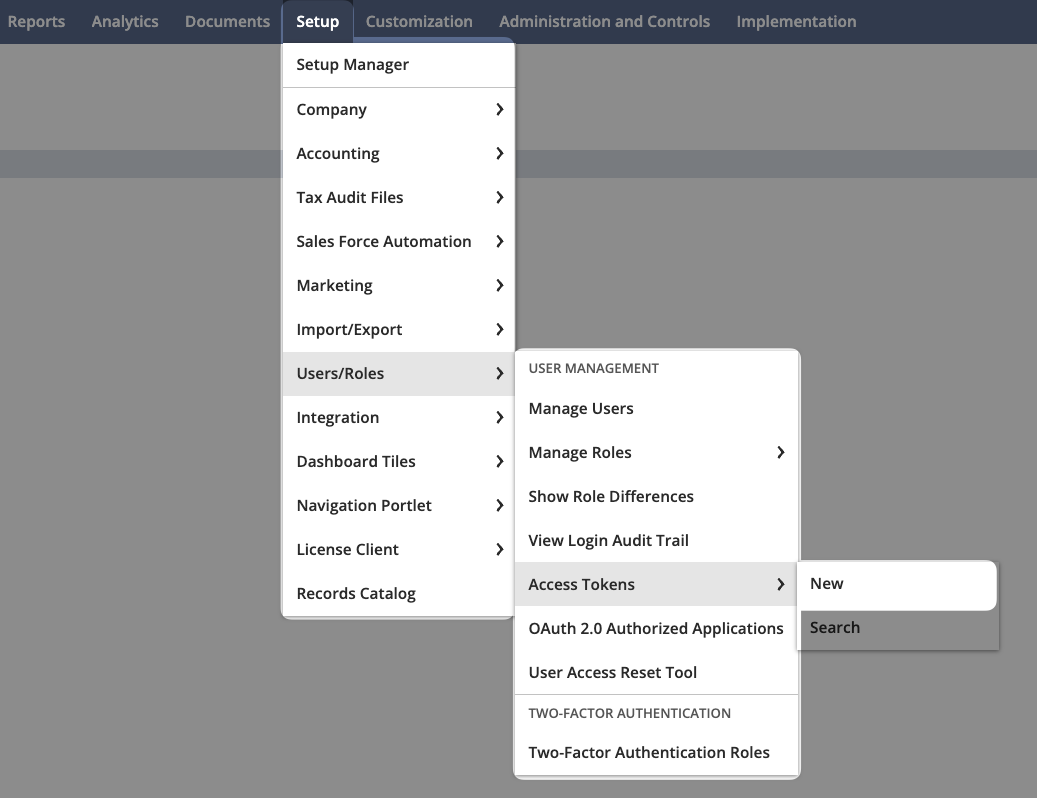
- In Netsuite, hover over Setup > Users/Roles > Access Tokens
- Click New
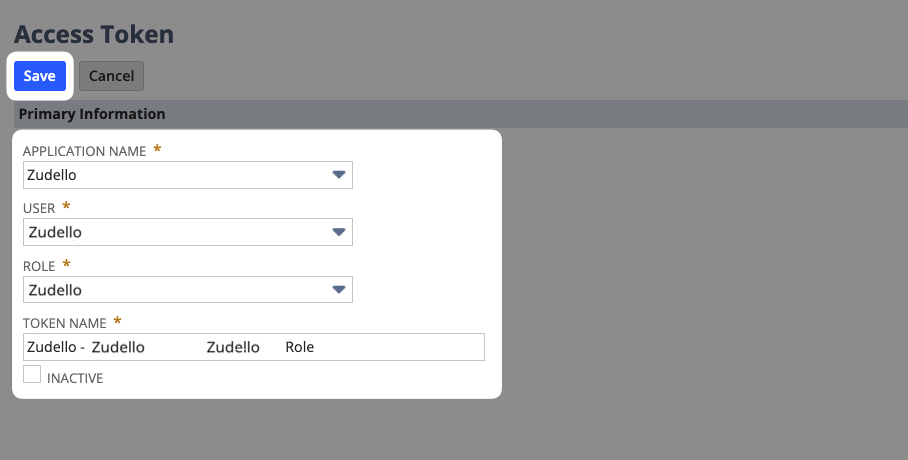
- For Application Name, select the integration you created in Step 2
- Select the User you assigned the role to in Step 5
- Select the Role you created in Step 4
- Click Save
You'll then see the Token ID and Token Secret. Save these details securely.
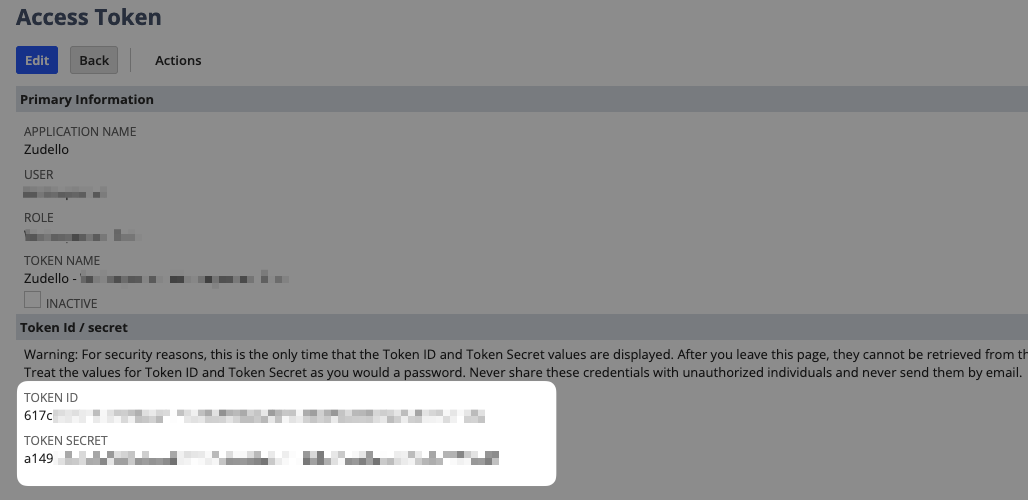
Copy the Token ID and Token Secret immediately and save them securely. These values cannot be retrieved again once you navigate away from this page.
Summary of credentials
You will now have all six required credentials:
- Account ID - From Step 3
- Sub Domain - From Step 3
- Consumer Key - From Step 2
- Consumer Secret - From Step 2
- Token ID - From Step 6
- Token Secret - From Step 6
Ensure these are saved securely for future reference.
Next steps
Provide all 6 credentials to either your Zudello Implementation consultant or implementation@zudello.com.
These credentials provide access to your Netsuite data. Only share them through secure channels with authorised Zudello representatives.
For added security we recommend using a secure password sharing tool such as 1Password or LastPass.
Need help?
If you encounter any issues during this process, contact your Zudello Implementation consultant or Zudello support for assistance.