Importing item default coding
Zudello's importing feature allows you to easily update default coding for your item catalogue in bulk.
Best practices
- Follow the recommended workflow below for ease and accuracy
- Verify that coding values exactly match those in Zudello (including spaces, hyphens, and capitalisation)
- Break large datasets into chunks of no more than 3,000 records per import
- Double-check your data before importing to avoid errors
Required permissions
To import item default coding, you need the following importing and item permissions:
Import permissions:
- System Import View
- System Import Create
- Inventory Catalogue Import
- Inventory Catalogue Create
- Inventory Catalogue Update
To use the recommended workflow detailed below, you will also need the following exporting permission:
Export permissions:
- System Export View
- System Export Create
- System Export Update
- Export Template Edit
- Export Template List
- Export Template View
- Export Template Visible
- Inventory Catalogue Export
Contact your organisation administrator to verify your current permissions.
Process overview
The importing process involves three main steps:
- Exporting your item list, including all fields you want to update
- Updating the exported data in Excel, Google Sheets, or another CSV editing program
- Importing the updated data back into Zudello
Step 1: Export your item template
Create the export template
To create a new Item export:
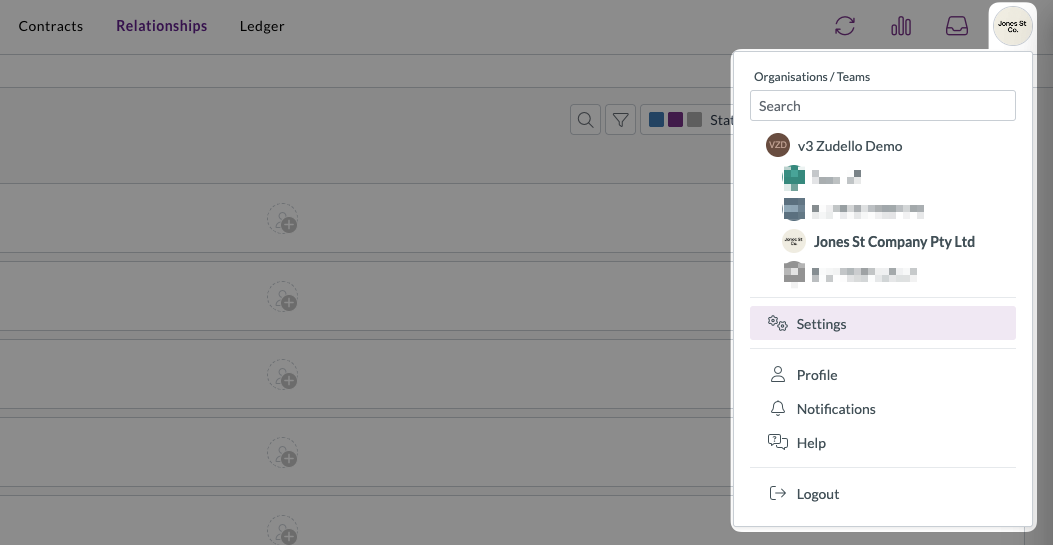
- Click the company name at the top right of your screen
- Click Settings
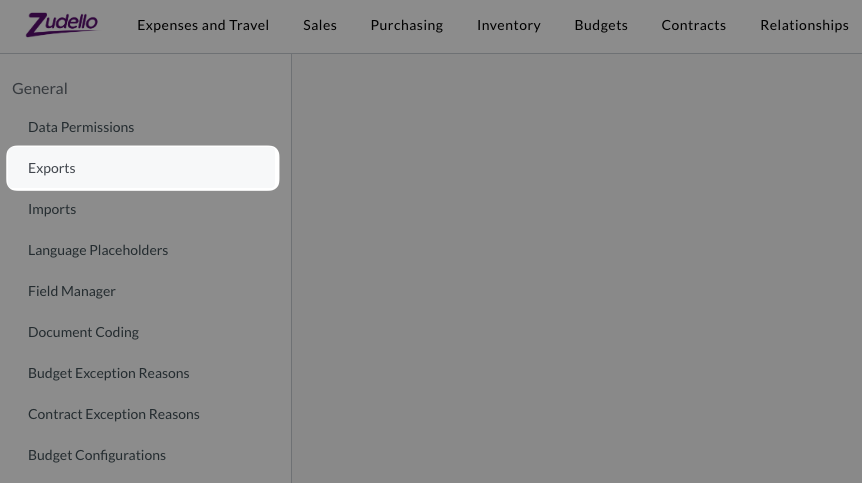
- In the left sidebar, click Exports
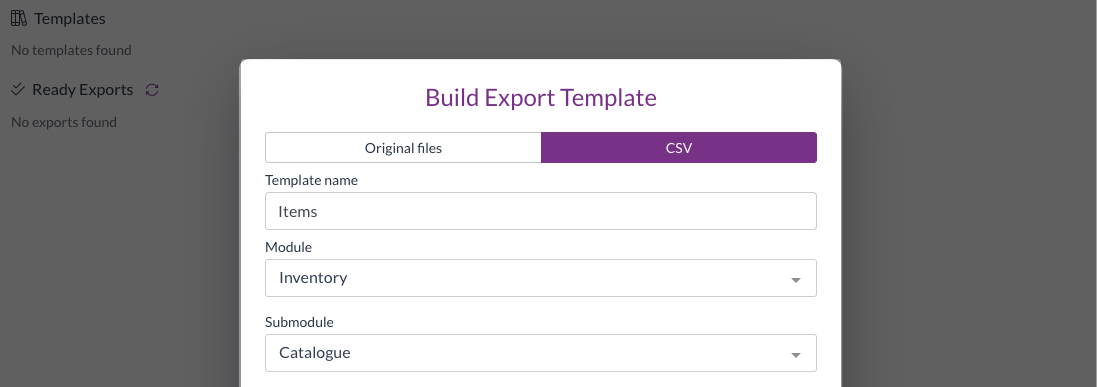
- Click Build export template

- Ensure CSV is selected
- Under Template name, select Items
- Under Module, select Inventory
- Under Submodule, select Catalogue
If your team has an existing Items template:
- Click the Edit template button

Select fields to export
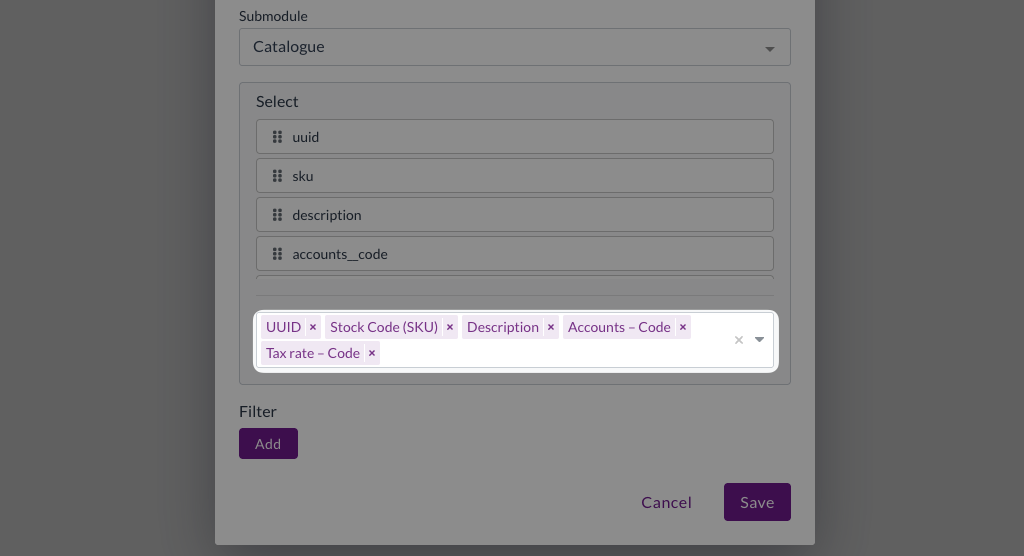
- From the Fields section, select the following fields:
- UUID (required for updating existing records)
- Stock Code (SKU)
- Description
The Stock Code (SKU) and Description fields are for reference only, to make it easier for you to find and filter items.
- For each dimension you want to update, select the Code field:
- E.g. If you are updating item defaukt coding for accounts and tax rates, select:
- Accounts - Code
- Tax rate - Code
- E.g. If you are updating item defaukt coding for accounts and tax rates, select:
There are several fields that have similar names. For example, there is a UUID field, which is the UUID of the item. There is then another UUID field under each dimension (e.g. Tax Rate UUID).
Ensure you are selecting the exact field names listed above.
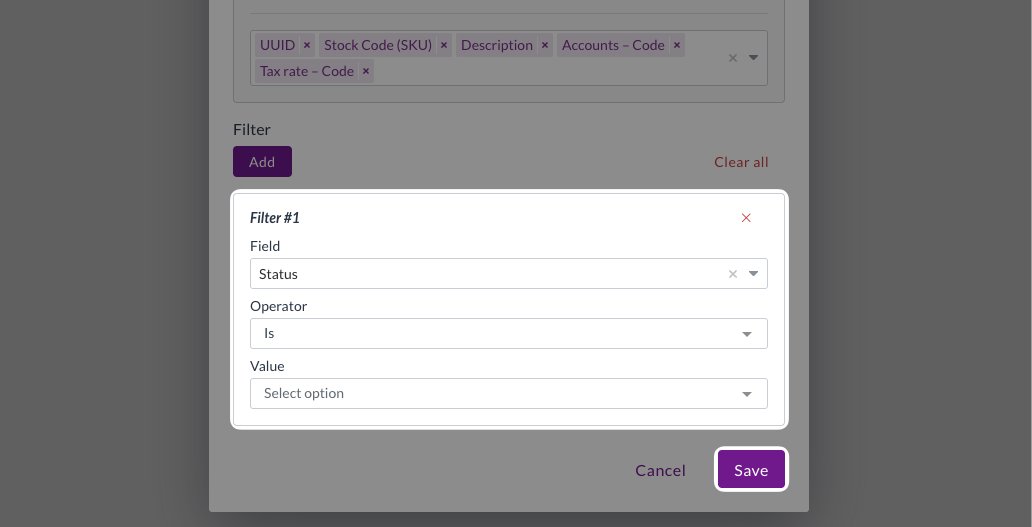
Add filters and save
- Under Filter, click Add
- Search for and select Status
- Under Operator, select Is
- Click Save
The template will now appear in your exports list.
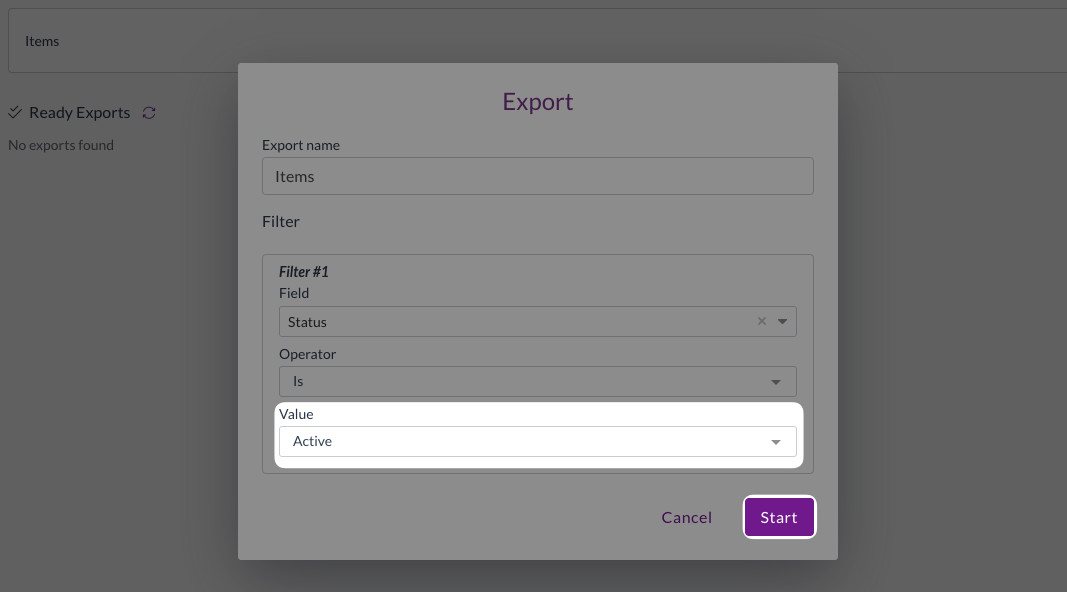
Run the export
To run the export:
- Click the Play button next to your newly created template

- A pop-up window will open
- Under Filter #1 > Value, select Active
- Click Start
The export will begin processing.
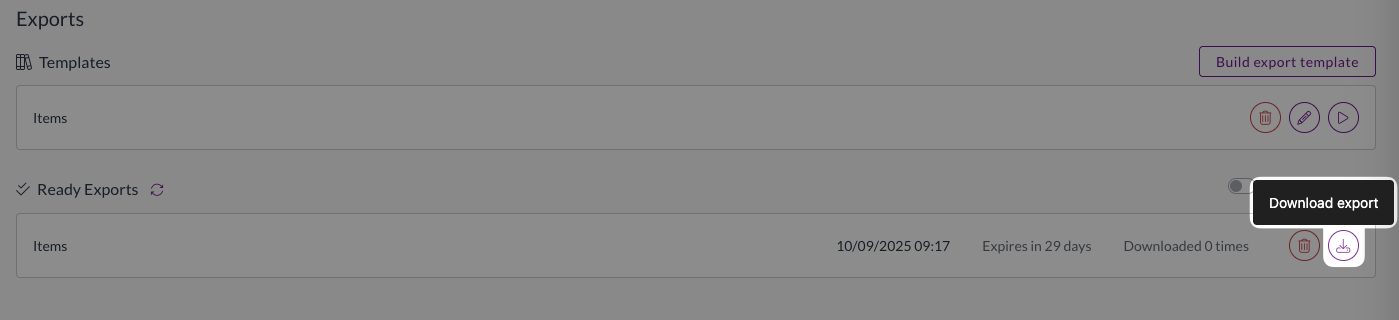
Monitor and download
- Click the refresh button to check the export status

- When ready, the export will appear in the Ready Exports list
- Click Download Export to save the CSV file
- Exports may take several minutes to generate. You can move to a different page and continue with your work, and the export will continue to generate in the background. You will receive an email notification once the export is ready for download.

Step 2: Update your item data
- Open the downloaded CSV in Excel, Google Sheets, or your preferred CSV editor
- Add the relevant coding values next to each item:
- E.g. if you are updating account, department, and tax rate defaults, enter:
- Account code in the accounts_code column
- Tax rate code in the tax_rate_code column
- E.g. if you are updating account, department, and tax rate defaults, enter:
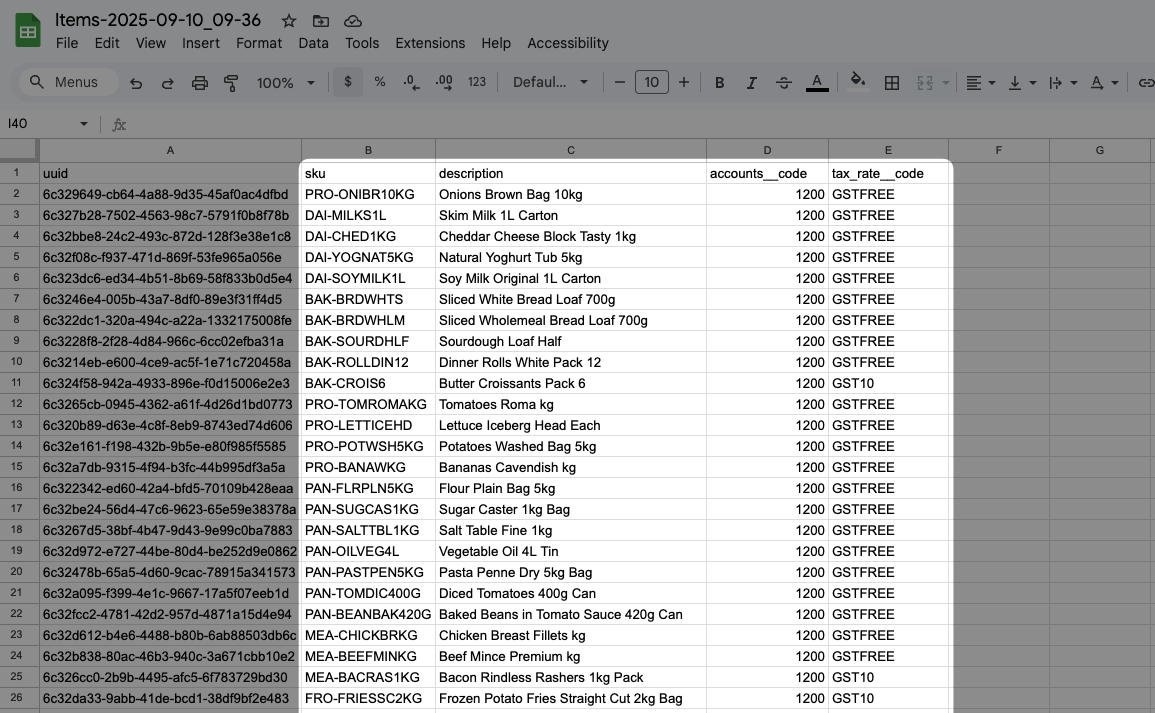
- Ensure coding values exactly match those in Zudello:
- Include any spaces, hyphens, or special characters
- Match capitalisation exactly
- Use the full code, not abbreviated versions
If you're unsure of the exact codes to use, go to Settings > Team Data and click on the relevant dimension (e.g. Accounts) for a full list
- Save your updated CSV file
Imports must be limited to 3,000 records maximum. If your file contains more than 3,000 records, please separate it into separate files and upload them separately.
Step 3: Import the updated data
Set up the import
Now that you have edited your item data, you can import it in bulk to apply all changes at once:
- Click the company name at the top right of your screen
- Click Settings
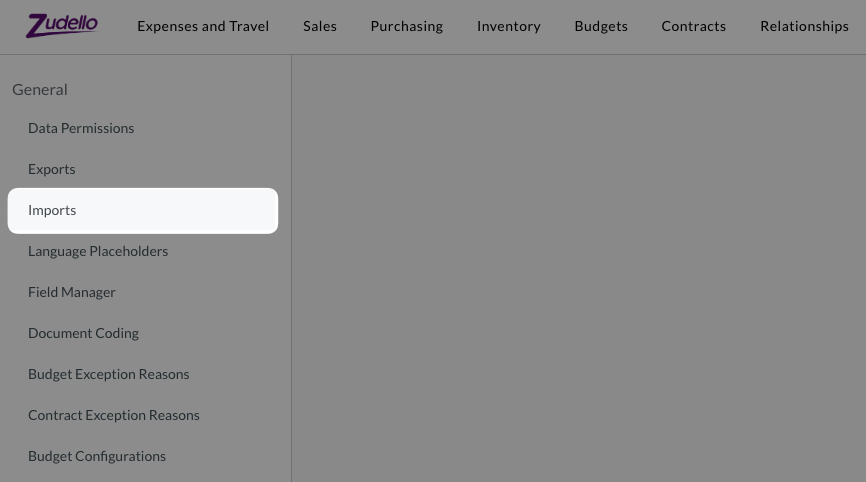
- In the left sidebar, click Imports
- Click Create

- Under Module, select Inventory
- Under Submodule, select Catalogue
- Leave the Item option selected
- Leave Form blank
- Under Status, select Active
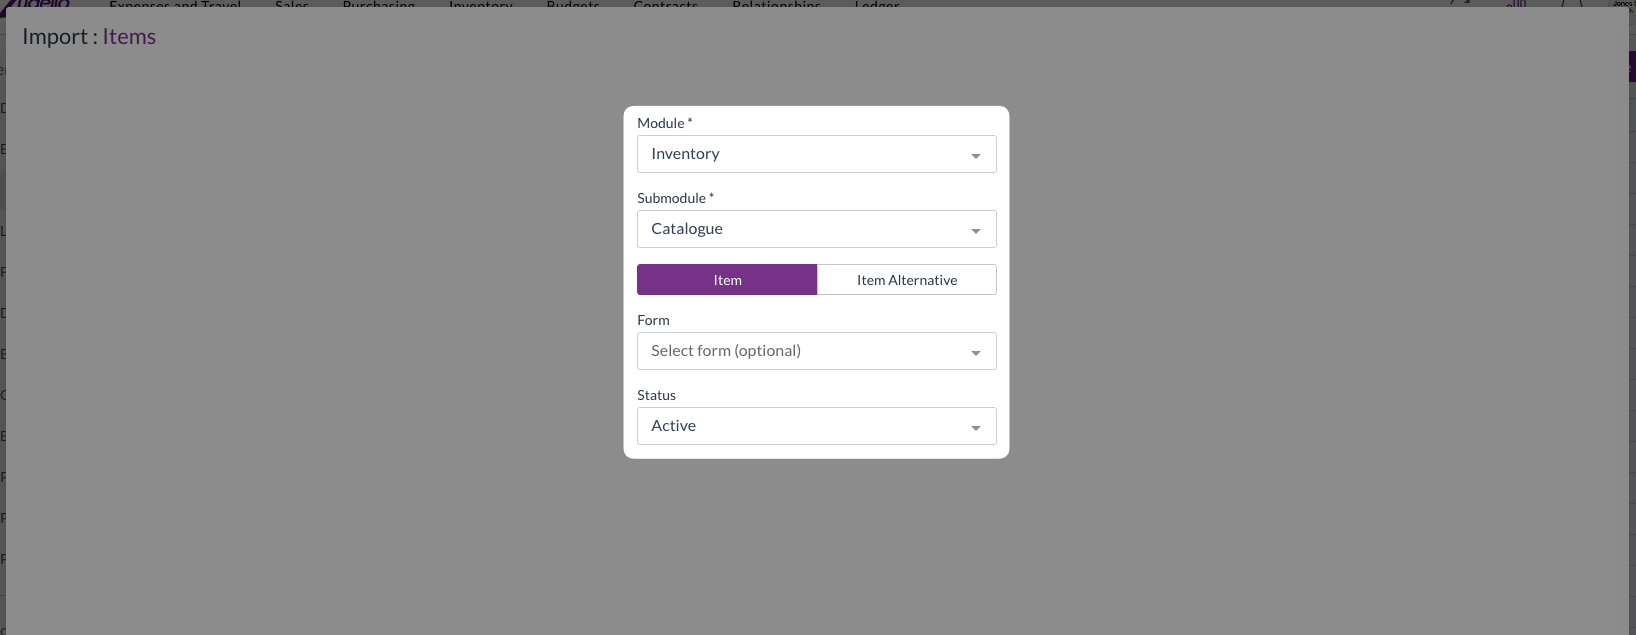
Ensure you select the Active status, even though it is an optional field.
If you don't select a status, the item records may not show as selectable options against transactions.
Upload and map your file
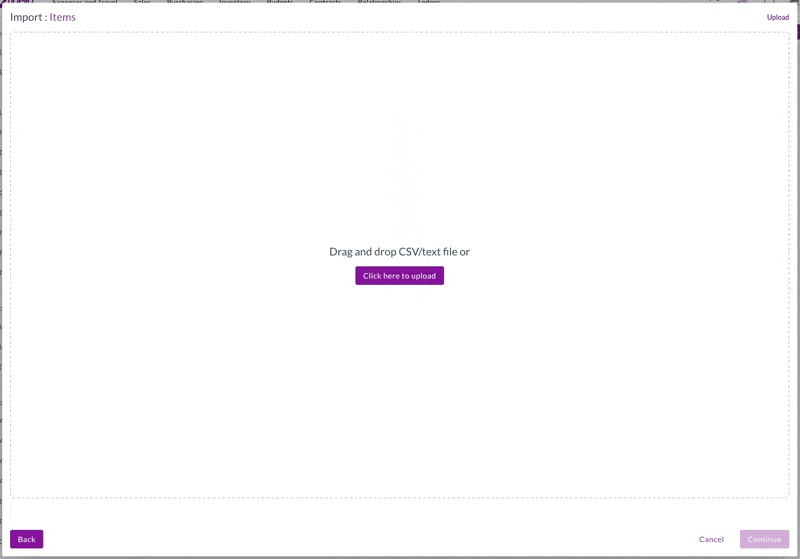
- Drag and drop your CSV file onto the upload area, or click Click here to upload and choose the file
- Zudello will automatically recognise column headers
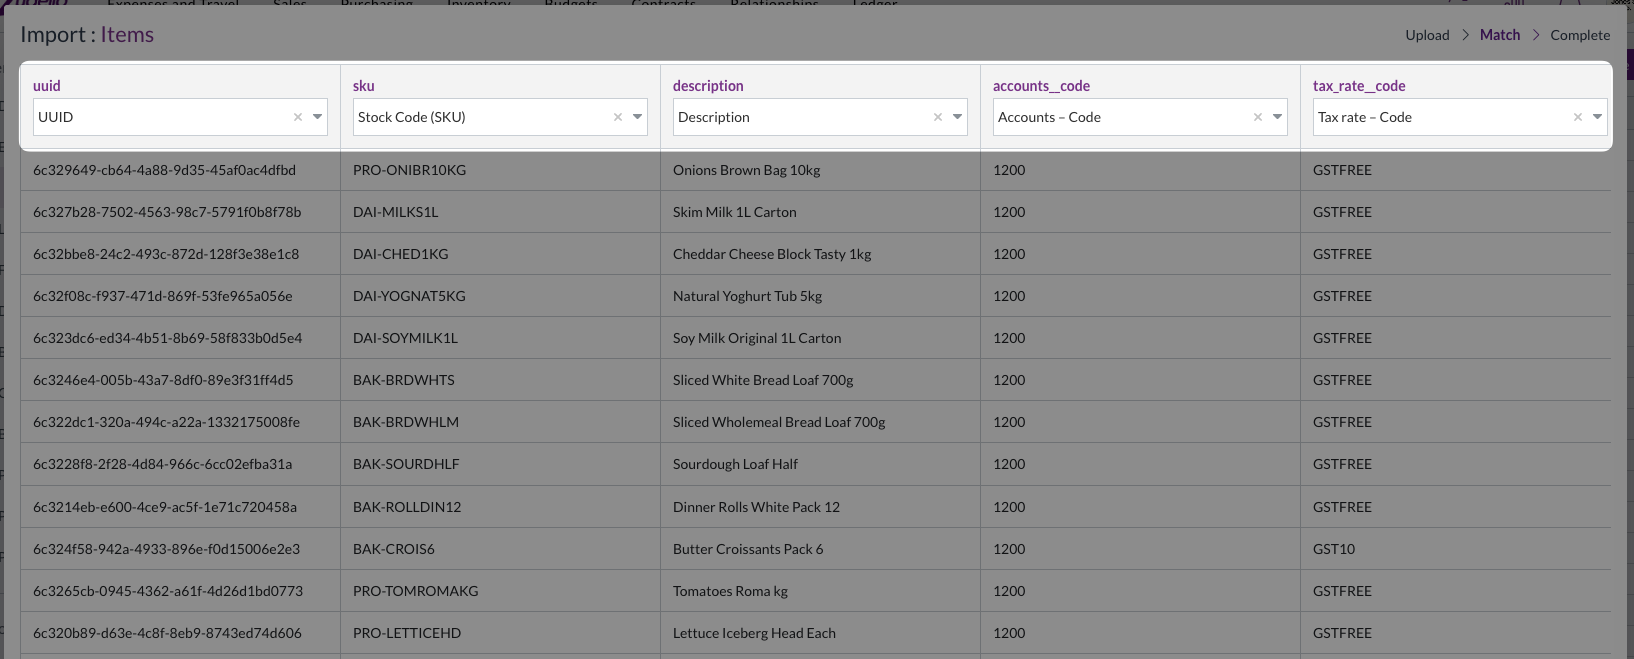
- Verify that all column headers are correctly mapped, particularly:
- UUID
- All relevant dimension fields, e.g.:
- Accounts - Code
- Departments - Code
- Tax rate - Code
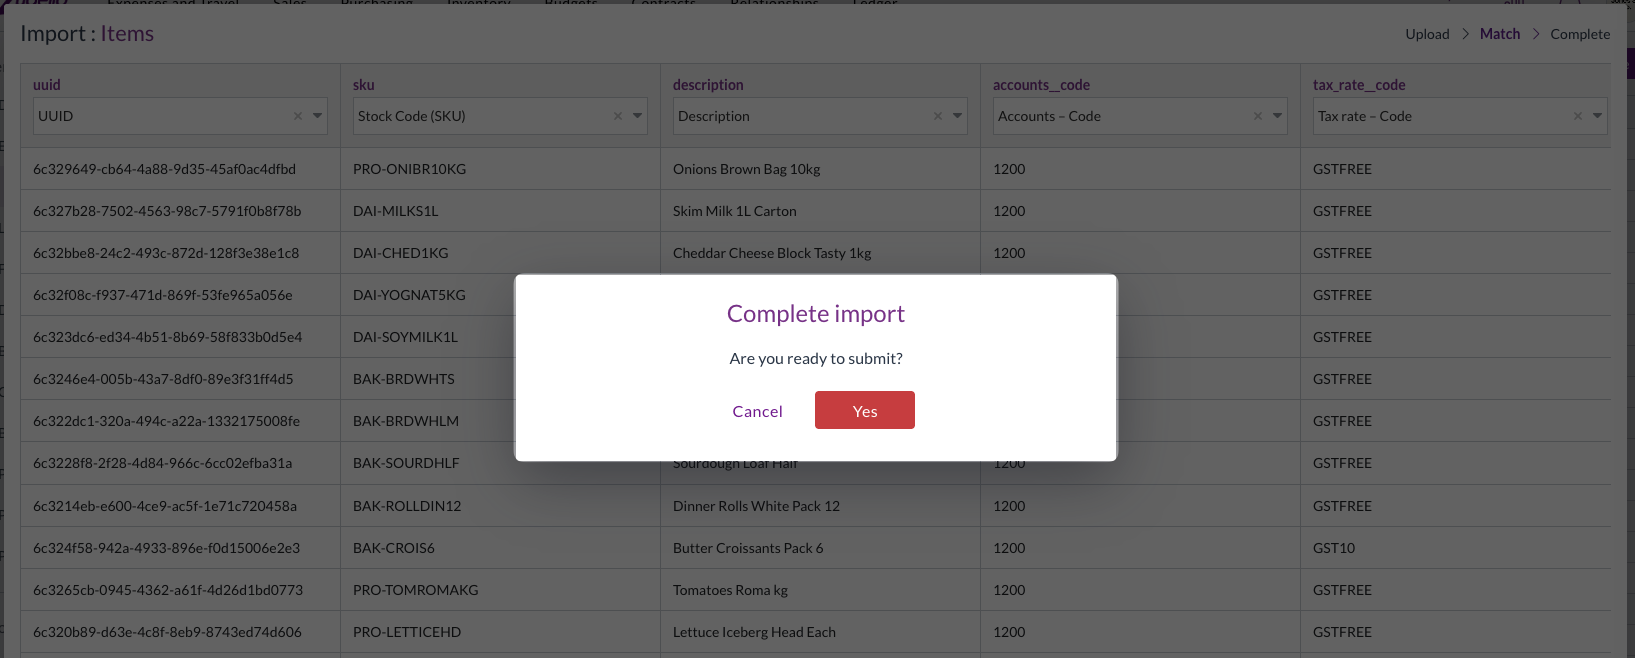
- Click Continue
- Click Yes to confirm
Monitor the import
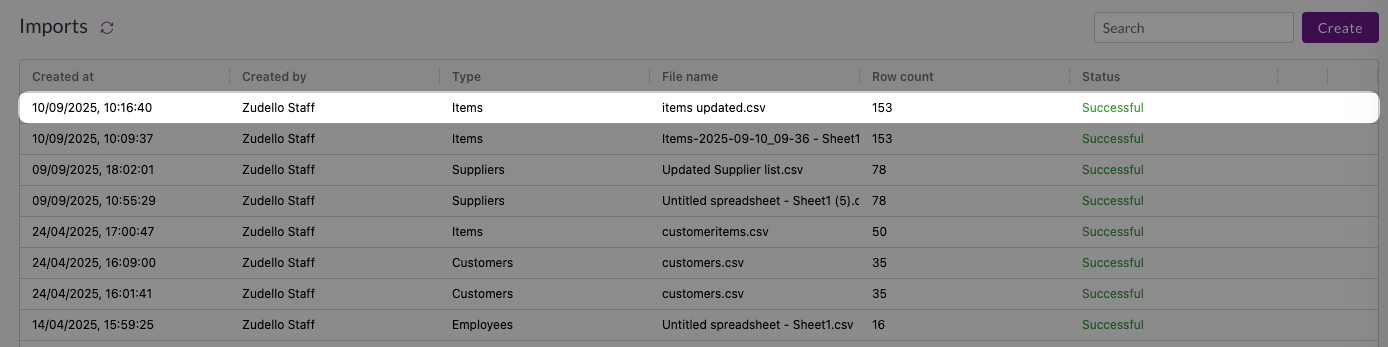
- Your import will begin processing immediately
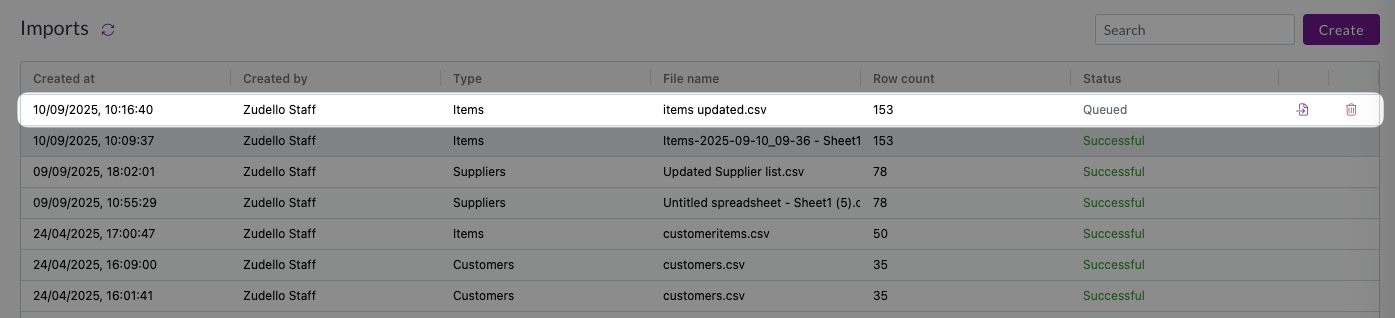
- Monitor progress in the Status column
- Click Refresh to update the status
- When complete, the status will show Successful
If any records fail, the status will show Failed. To address failed imports:
- Click the icon next to the status.
- Review the detailed error explanations.
- Correct the issues in your import file.
- Create a new import and try again.
Important considerations
- ERP integration: If you pull item data from your ERP system, imported changes may be overridden the next time data is fetched from your ERP
- Large imports: Imports with many records take longer to process and are not instant
- Error handling: Failed imports provide detailed error information to help you identify and fix issues
- Data validation: Always double-check column headers to ensure you're not importing invalid data
Need help?
Contact your organisation administrator or Zudello support if you encounter issues with importing item default coding or need assistance with the process.