Configuring Microsoft Teams to receive approval notifications
Zudello's flexible configuration allows you to receive approval notifications via the channel that makes the most sense for your team. Follow the steps in this guide to receive your approval notifications via Microsoft Teams.
Configuring Microsoft Teams
The configuration involves 4 stages:
- Creating an Azure Bot
- Configuring application permissions
- Adding the custom Teams app
- Providing the application details to Zudello
You will need to complete each stage in order. You must complete every step in every stage in order for the integration to function as expected.
If you have any questions, please reach out to your Zudello implementation consultant or support@zudello.com.
Creating an Azure Bot
The first step in enabling Zudello notifications via Microsoft Teams is creating an Azure Bot. To create an Azure Bot:
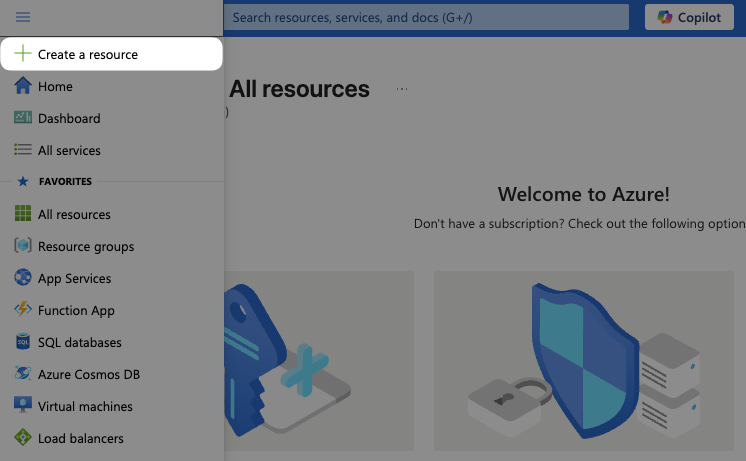
- Open the Azure Portal
- In the main menu, click Create a resource
- Search for Bot in the search field and click on Azure Bot
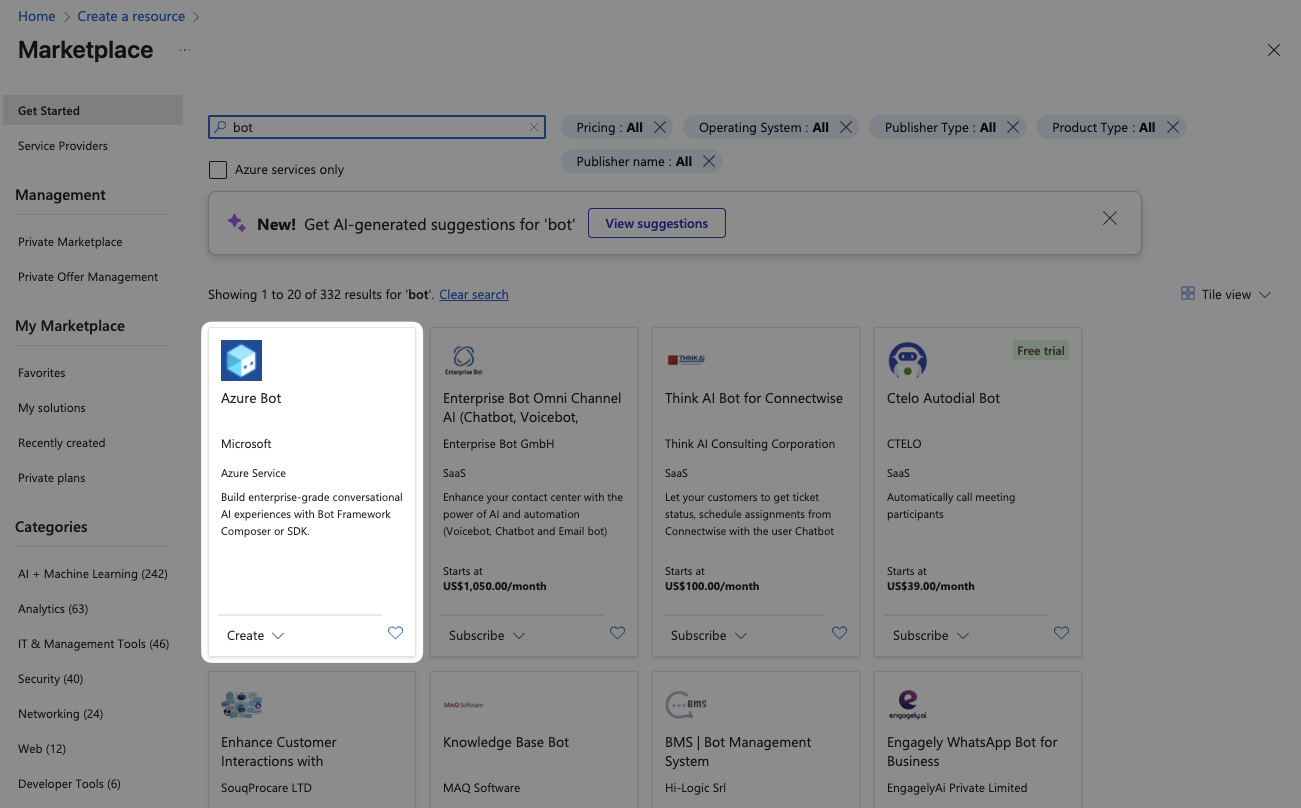
- Click Create

- Fill in the following information:
- Bot handle: Any bot name (Suggestion: Zudello Bot)
- Subscription: Azure subscription 1
- Resource Group: Zudello_group
- Data residency: Global
- Type of App: Multi Tenant
- Creation type:Create new Microsoft App ID
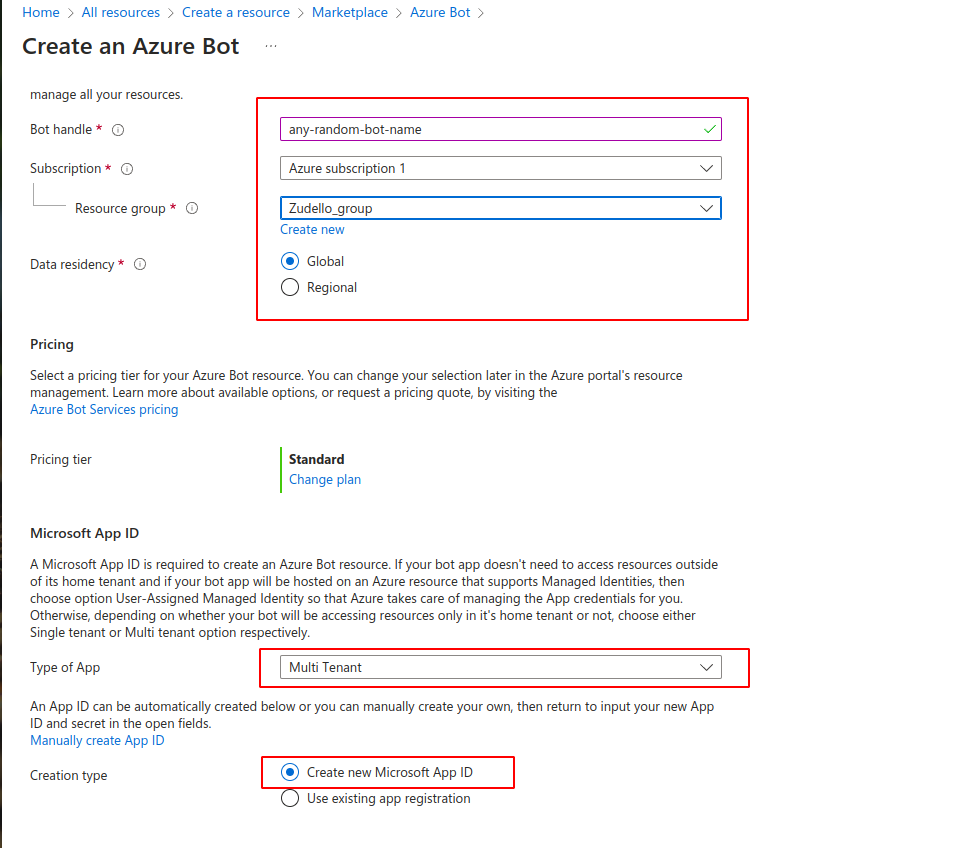
- Click Review + Create
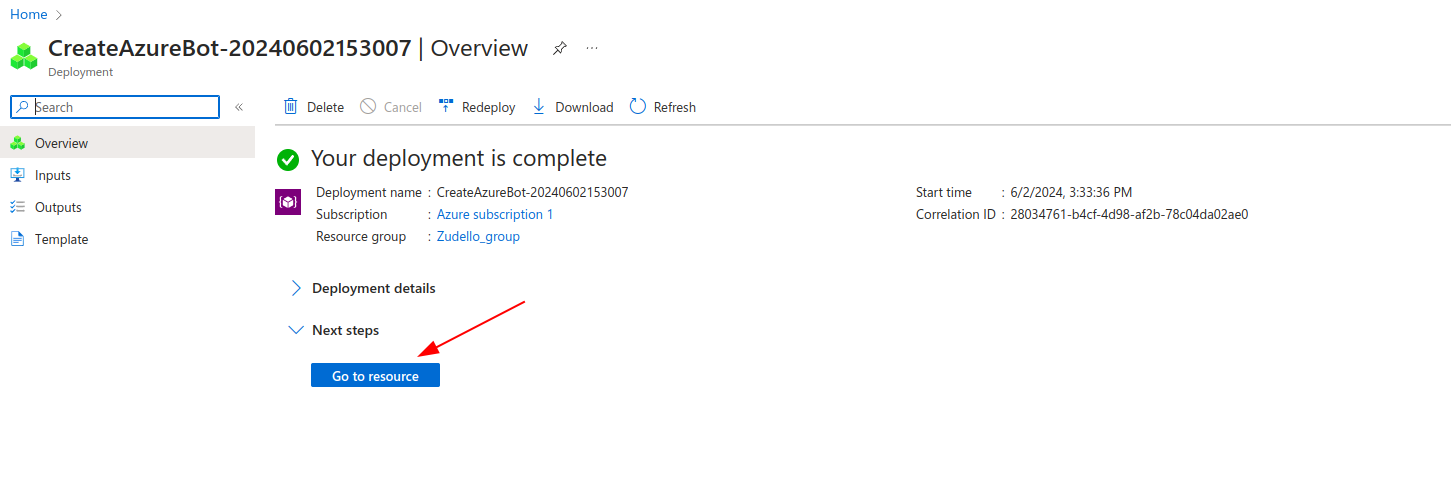
- Wait 5-10 seconds, then click Create
- Click Go to resource
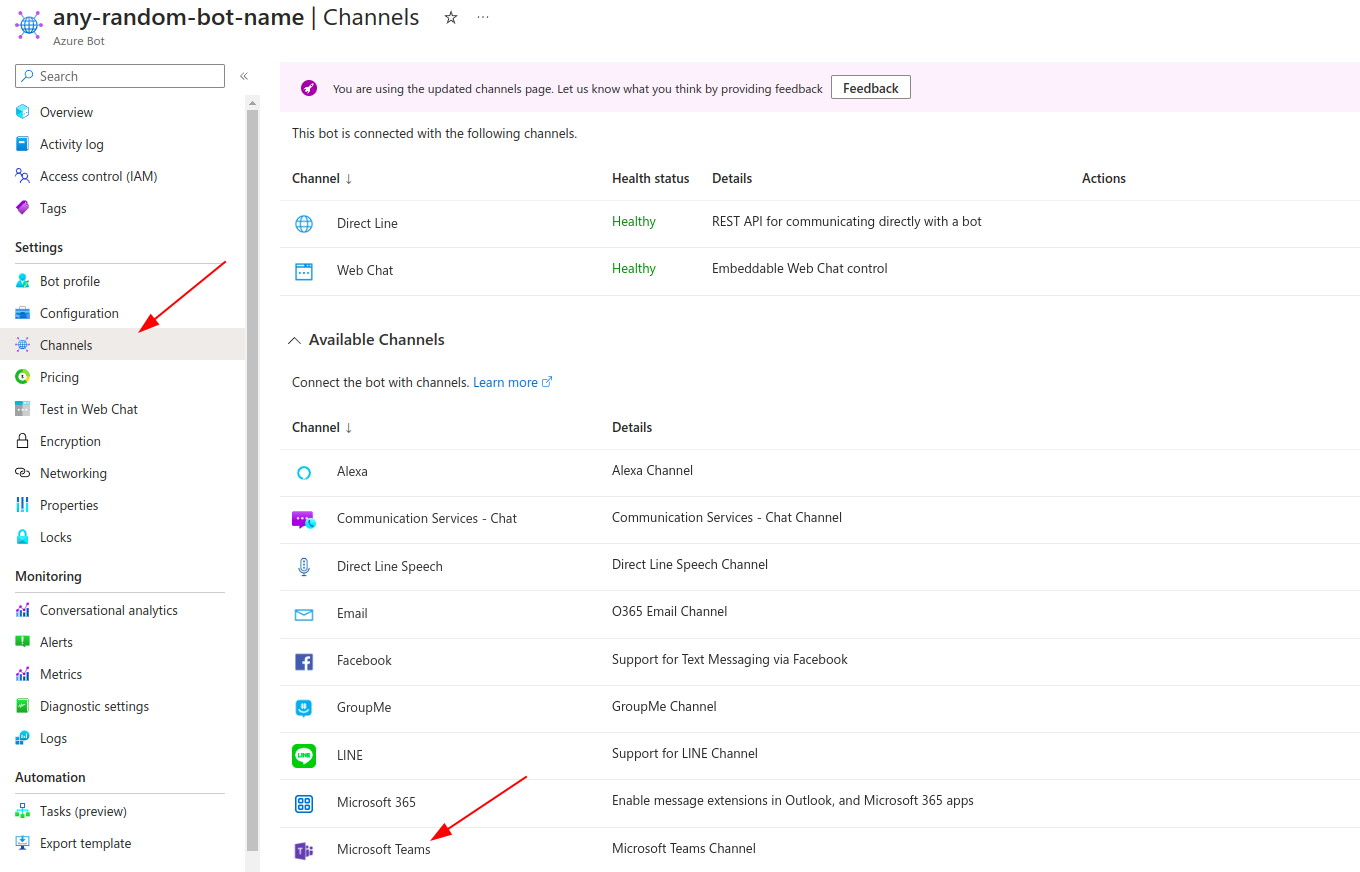
- In the side menu, click Channels
- Under Available Channels, click Microsoft Teams
- If prompted, review and agree to the terms of service
- Under Messaging, ensure you have selected Microsoft Teams Commercial, then click Apply
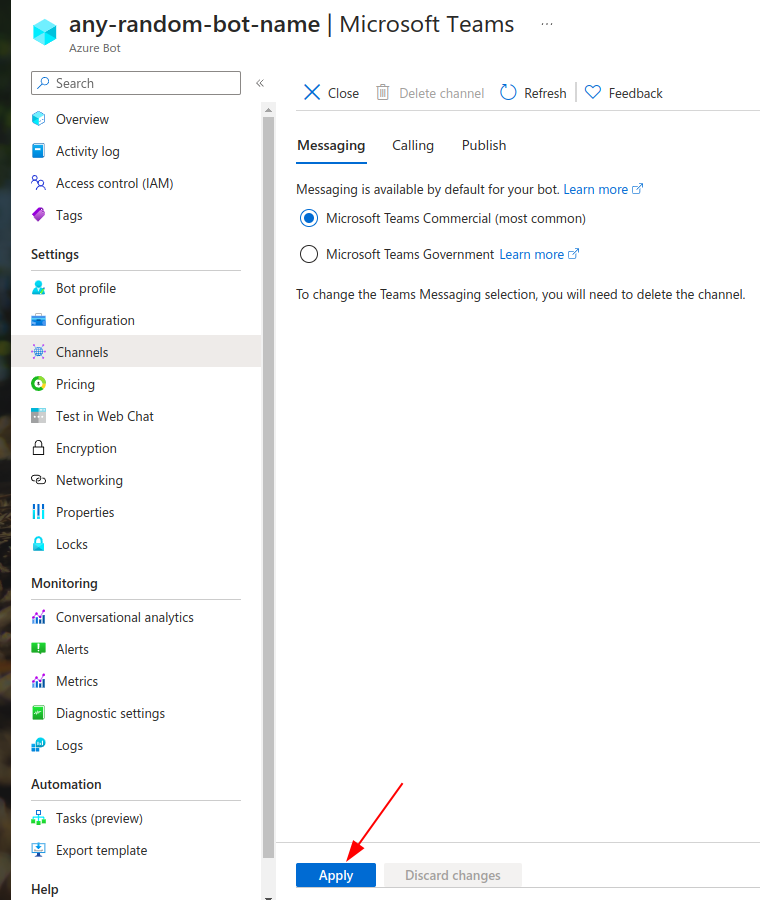
- Wait 10-20 seconds to allow the changes to apply, then click Close
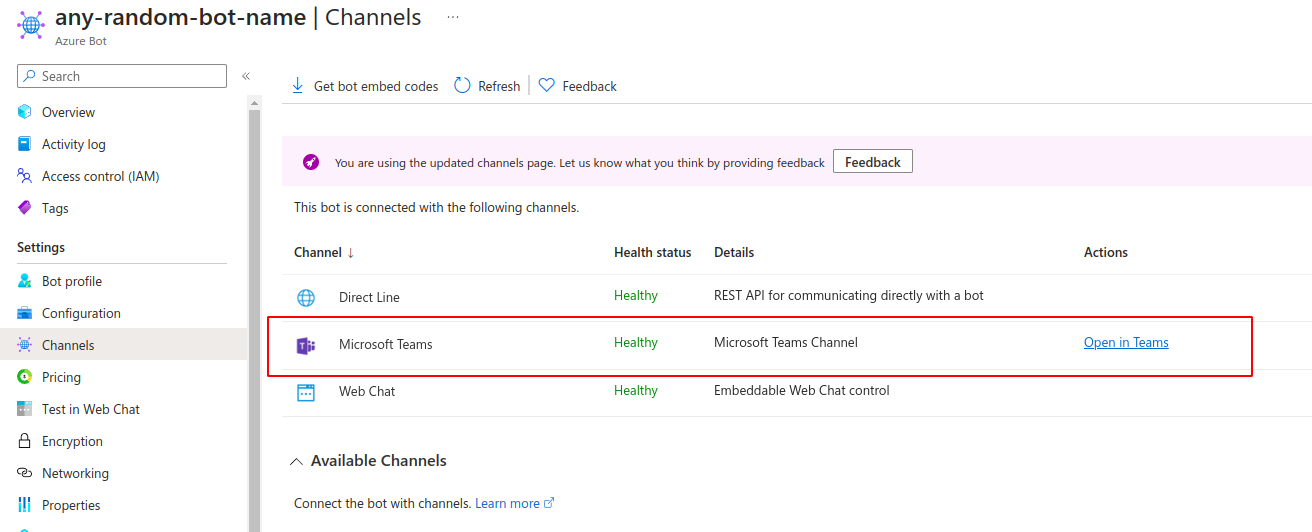
- Ensure that Microsoft Teams now appears in the list of channels connected with your bot
- In the side menu click Configuration
- Under Messaging endpoint, enter https://api.au.3.zudello.io/integration-api/v1/webhook/teams/message
- Click Apply
The Azure Bot has now been created.
Configuring application permissions
Now that you have created an Azure Bot, you need to configure certain application permissions:
- Open the Applications list
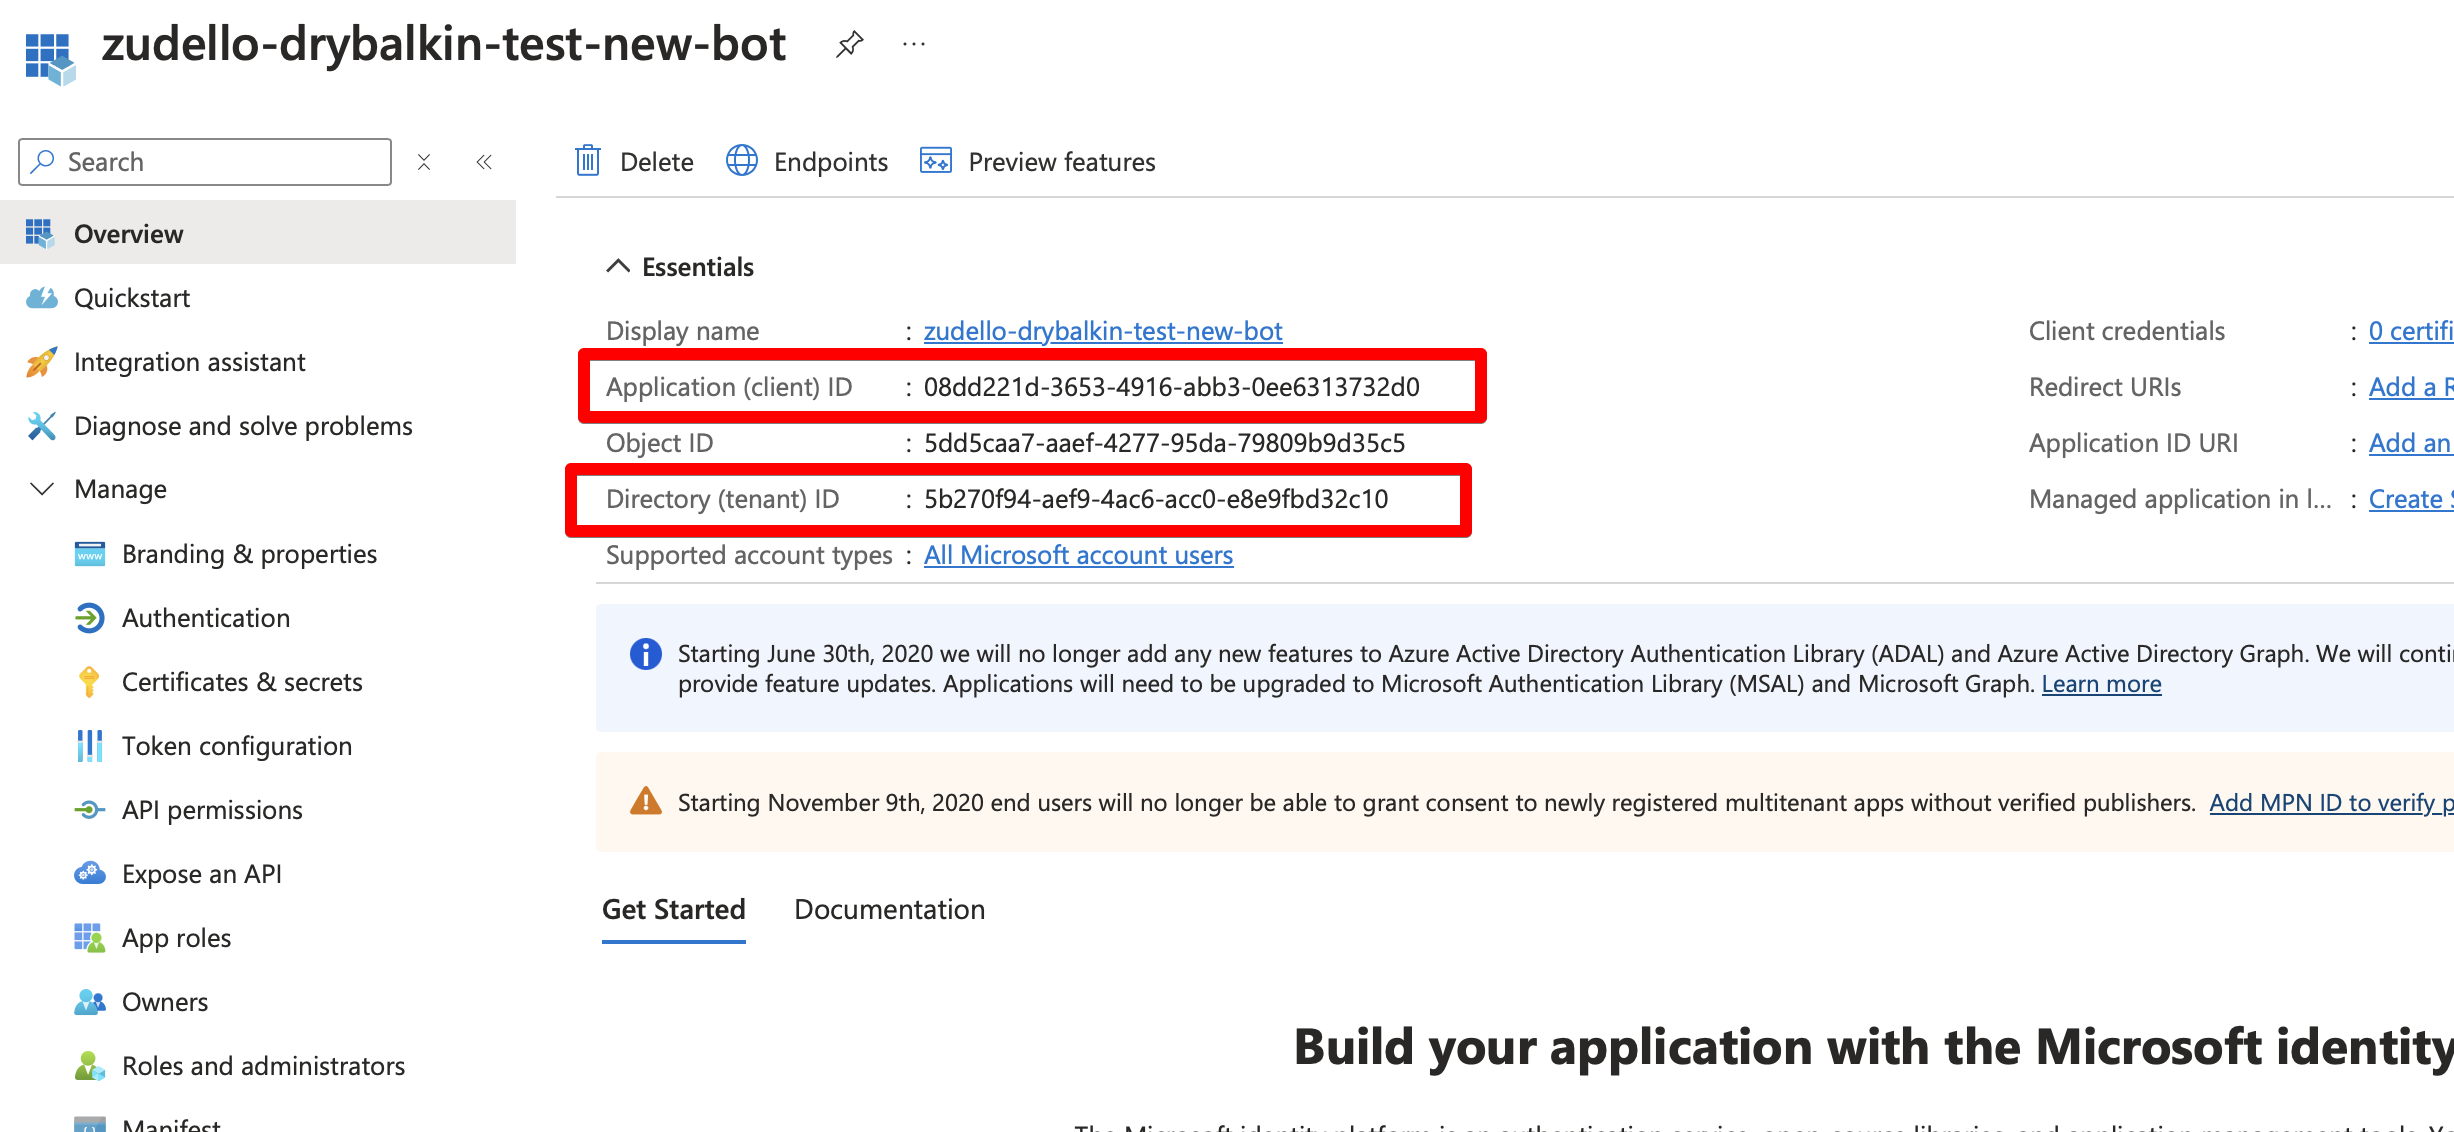
- Under All applications, click your application

- Copy the Application (client) ID and Directory (tenant) ID and save them somewhere secure
- In the side menu, click Certificates & secrets
- Click the Client secrets tab
- Click New client secret
- Add a description and click Add
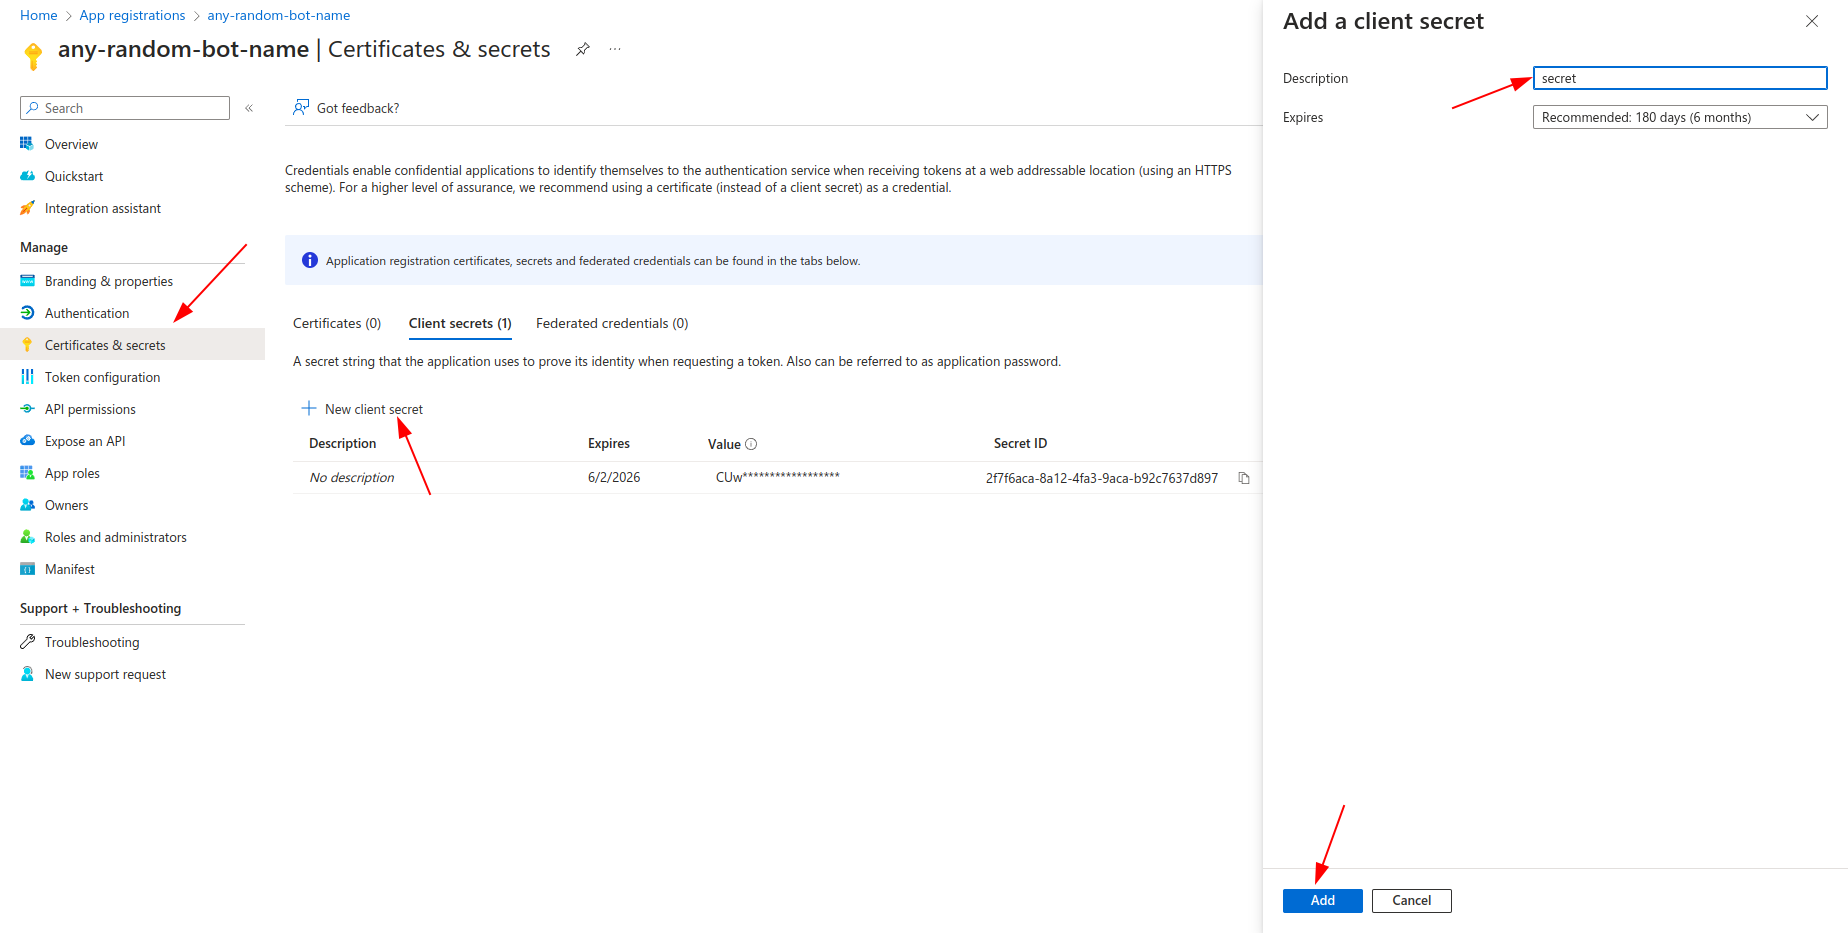
- Copy the newly created secret Value
You will not be able to see the secret value again after leaving this screen. Please ensure that you copy the client secret Value and save it securely before moving on.
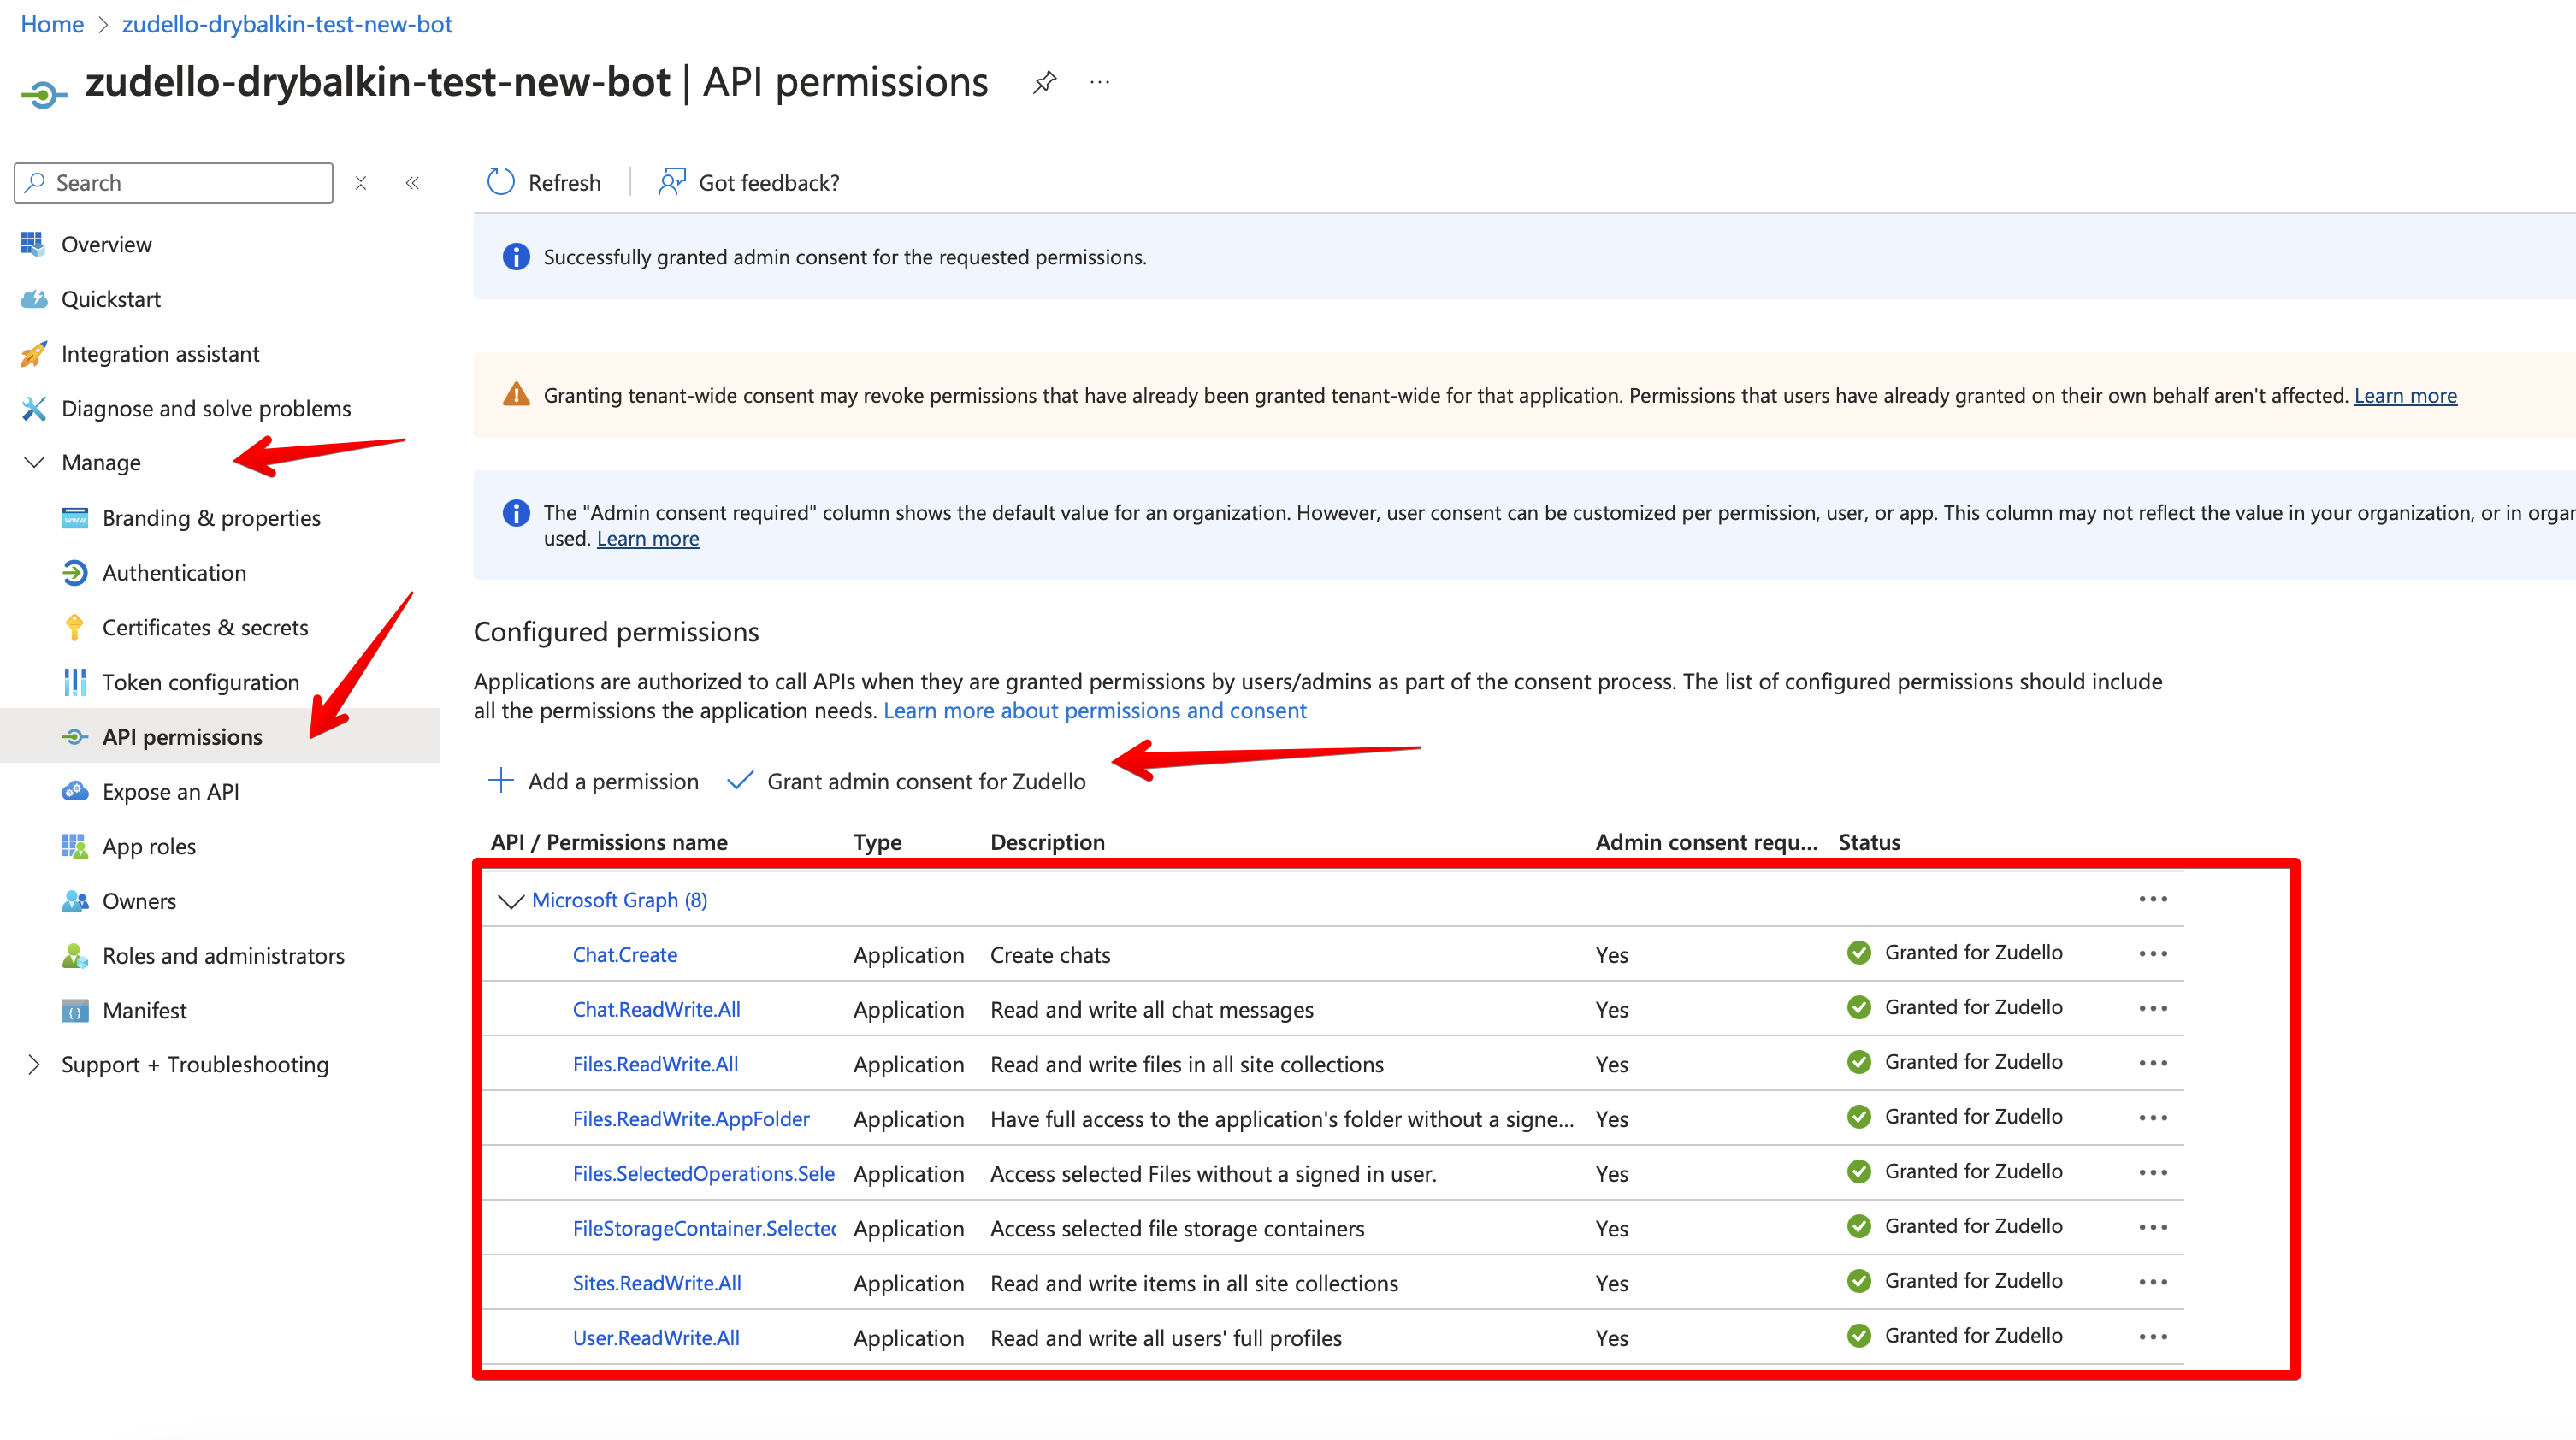
- In the side menu, under Manage, click API permissions
- Click Add a permission
- Select Microsoft Graph, then Application permissions
- Add the following permissions:
- Chat.Create
- Chat.ReadWrite.All
- Files.ReadWrite.All
- Files.ReadWrite.AppFolder
- Files.SelectedOperations.Selected
- FileStorageContainer.Selected
- Sites.ReadWrite.All
- User.ReadWrite.All
- Once all permissions are added, click Grant admin consent
The application permissions have now been set up.
Adding the custom Teams app
Now that app permissions have been set up, we need to download and edit an app package template and add it to Microsoft Teams.
- Click this link to download the app package template.
The template folder will be downladed as a .zip file.
- Unzip the .zip file by double-clicking (Mac) or right-clicking the file and clicking Extract all (Windows)
- Open the unzipped folder
- Open the file named manifest.json and update the following fields:
id: Paste your Application (client) ID here,
...
bot: [
    {
    botId: Paste your Application (client) ID here
    },
...
webApplicationInfo: {
    id: Paste your Application (client) ID here
    },
You saved your Application (client) ID in Step 3 of Configuring application permissions
- Save and close the file
- Re-zip the folder by right clicking it and selecting Compress "teams-app-manifest" (Mac) or Send to > Compressed (zipped) folder (Windows)
- Open Microsoft Teams
- In the side menu, click Apps
- Click Manage your apps
- Click Upload an app
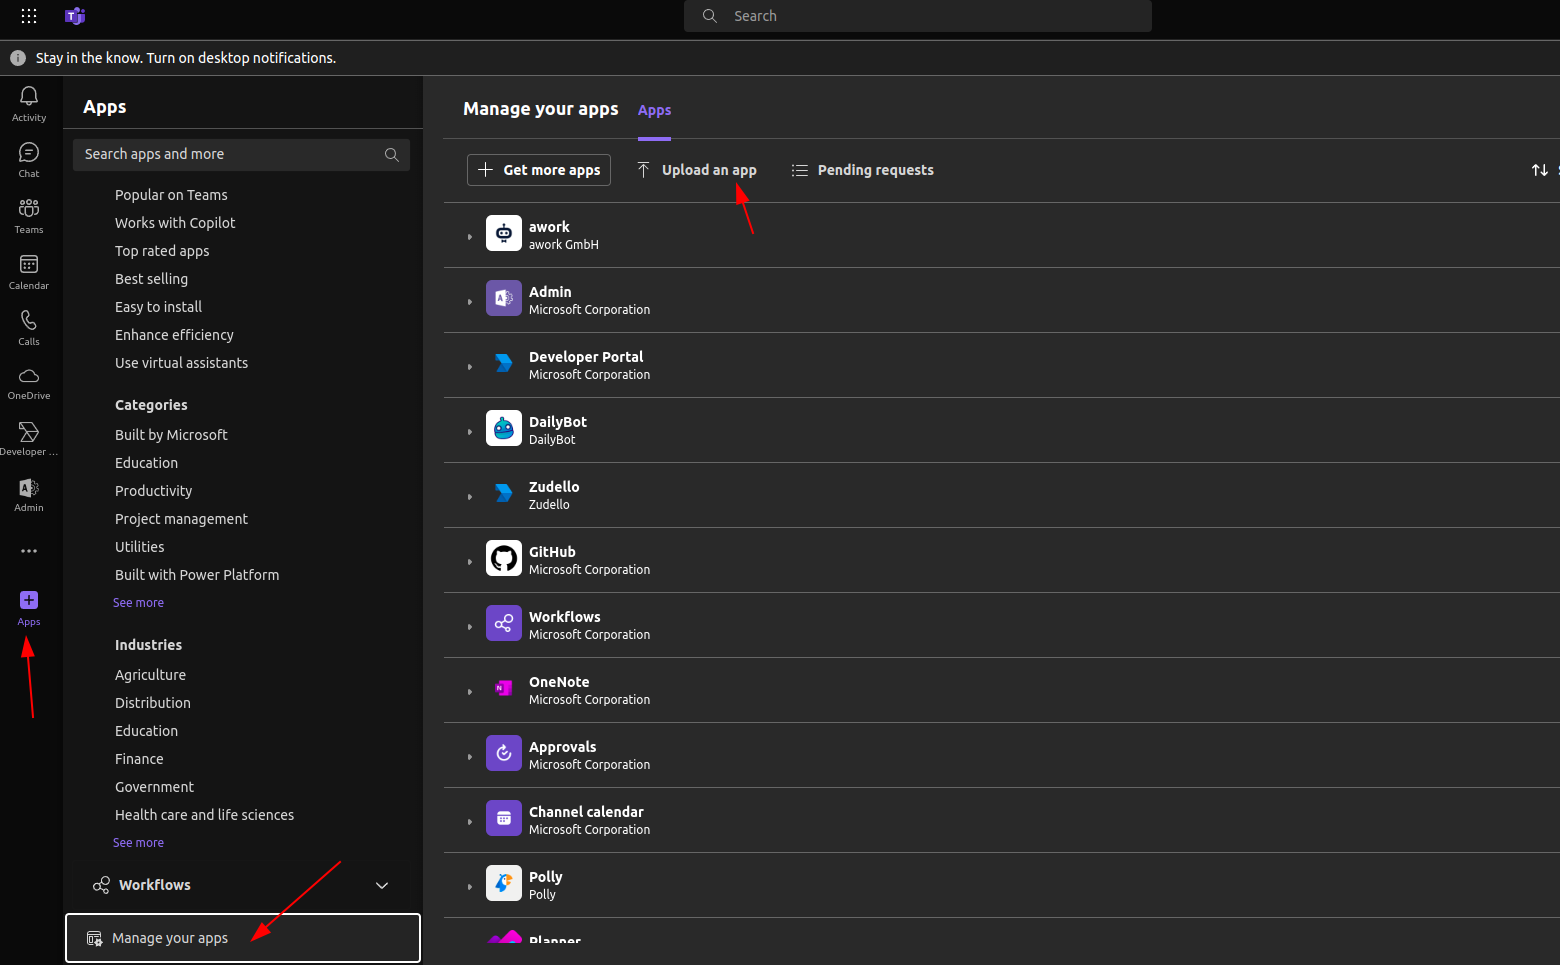
- Click Upload a custom app
- Select the updated teams-app-manifest.zip file you zipped in Step 5
- Click Add
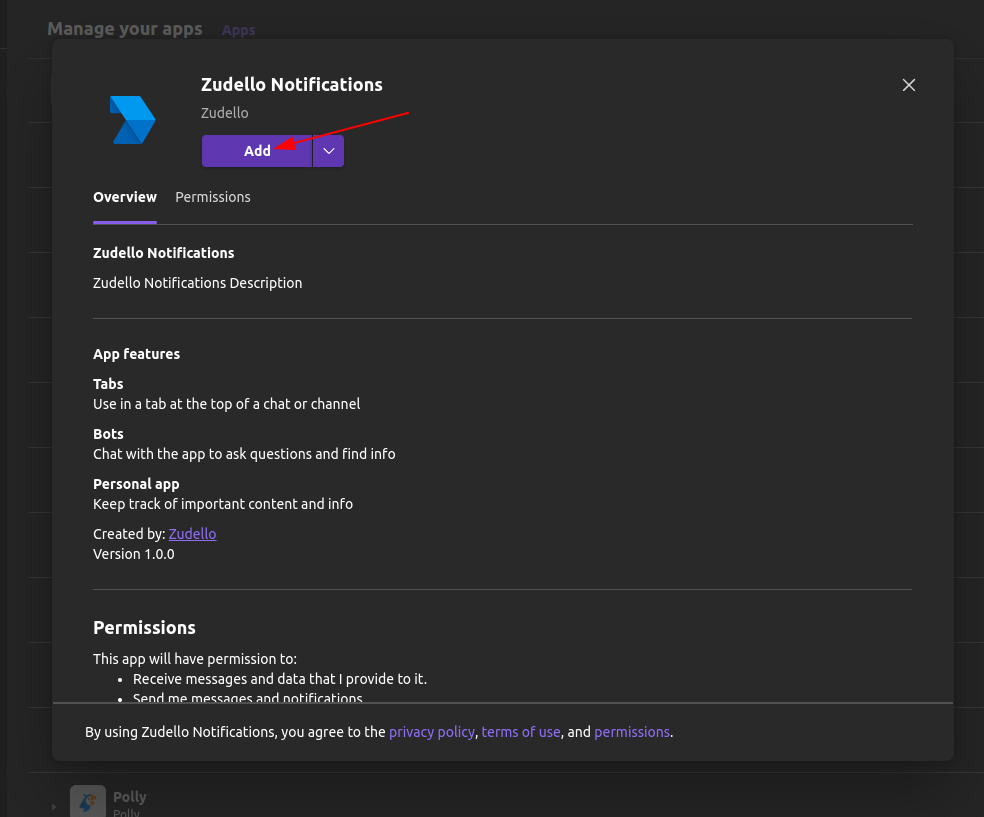
The app has been uploaded to your Microsoft Teams instance
Providing the application details to Zudello
Almost done! The last thing you need to do is provide your Zudello implementation consultant with the following details:
- Application (client) ID
- Directory (tenant) ID
- Client secret value
For added security, send the client secret value using a secure password sharing service such as LastPass or 1Password.
We'll take it from here!
Once you've provided these details to your Zudello implementation consultant, we will take care of the remaining set up.
We'll let you know once your Teams integration is fully set up and ready to use.
Any questions?
If you have any questions while running through the steps above, please reach out to your Zudello implementation consultant or support@zudello.com.